DIY Waterproof Travel Changing Pad Tutorial
I have always found travel changing pads to be extremely frustrating. I’ve owned several over my nearly 15 years of motherhood and have never found one that was big enough. I understand that they need to be compact so as to not take up too much space in a diaper bag, but it always seems to me as if they are only made with a newborn in mind. What about when you have a poppy two-and-a-half-year-old (or three-and-a-half-year-old)? That tiny water-resistant scrap of fabric will barely block contact between their bum and the questionably clean surface of a grimy fold-down plastic changing table. I have always wished instead for a travel changing pad that was compact, water resistant, and covered the entire changing table. I’ve never found one available to purchase, and as I have two more little ones on the way, and many diapers still in my future, I finally got to work and made one myself.
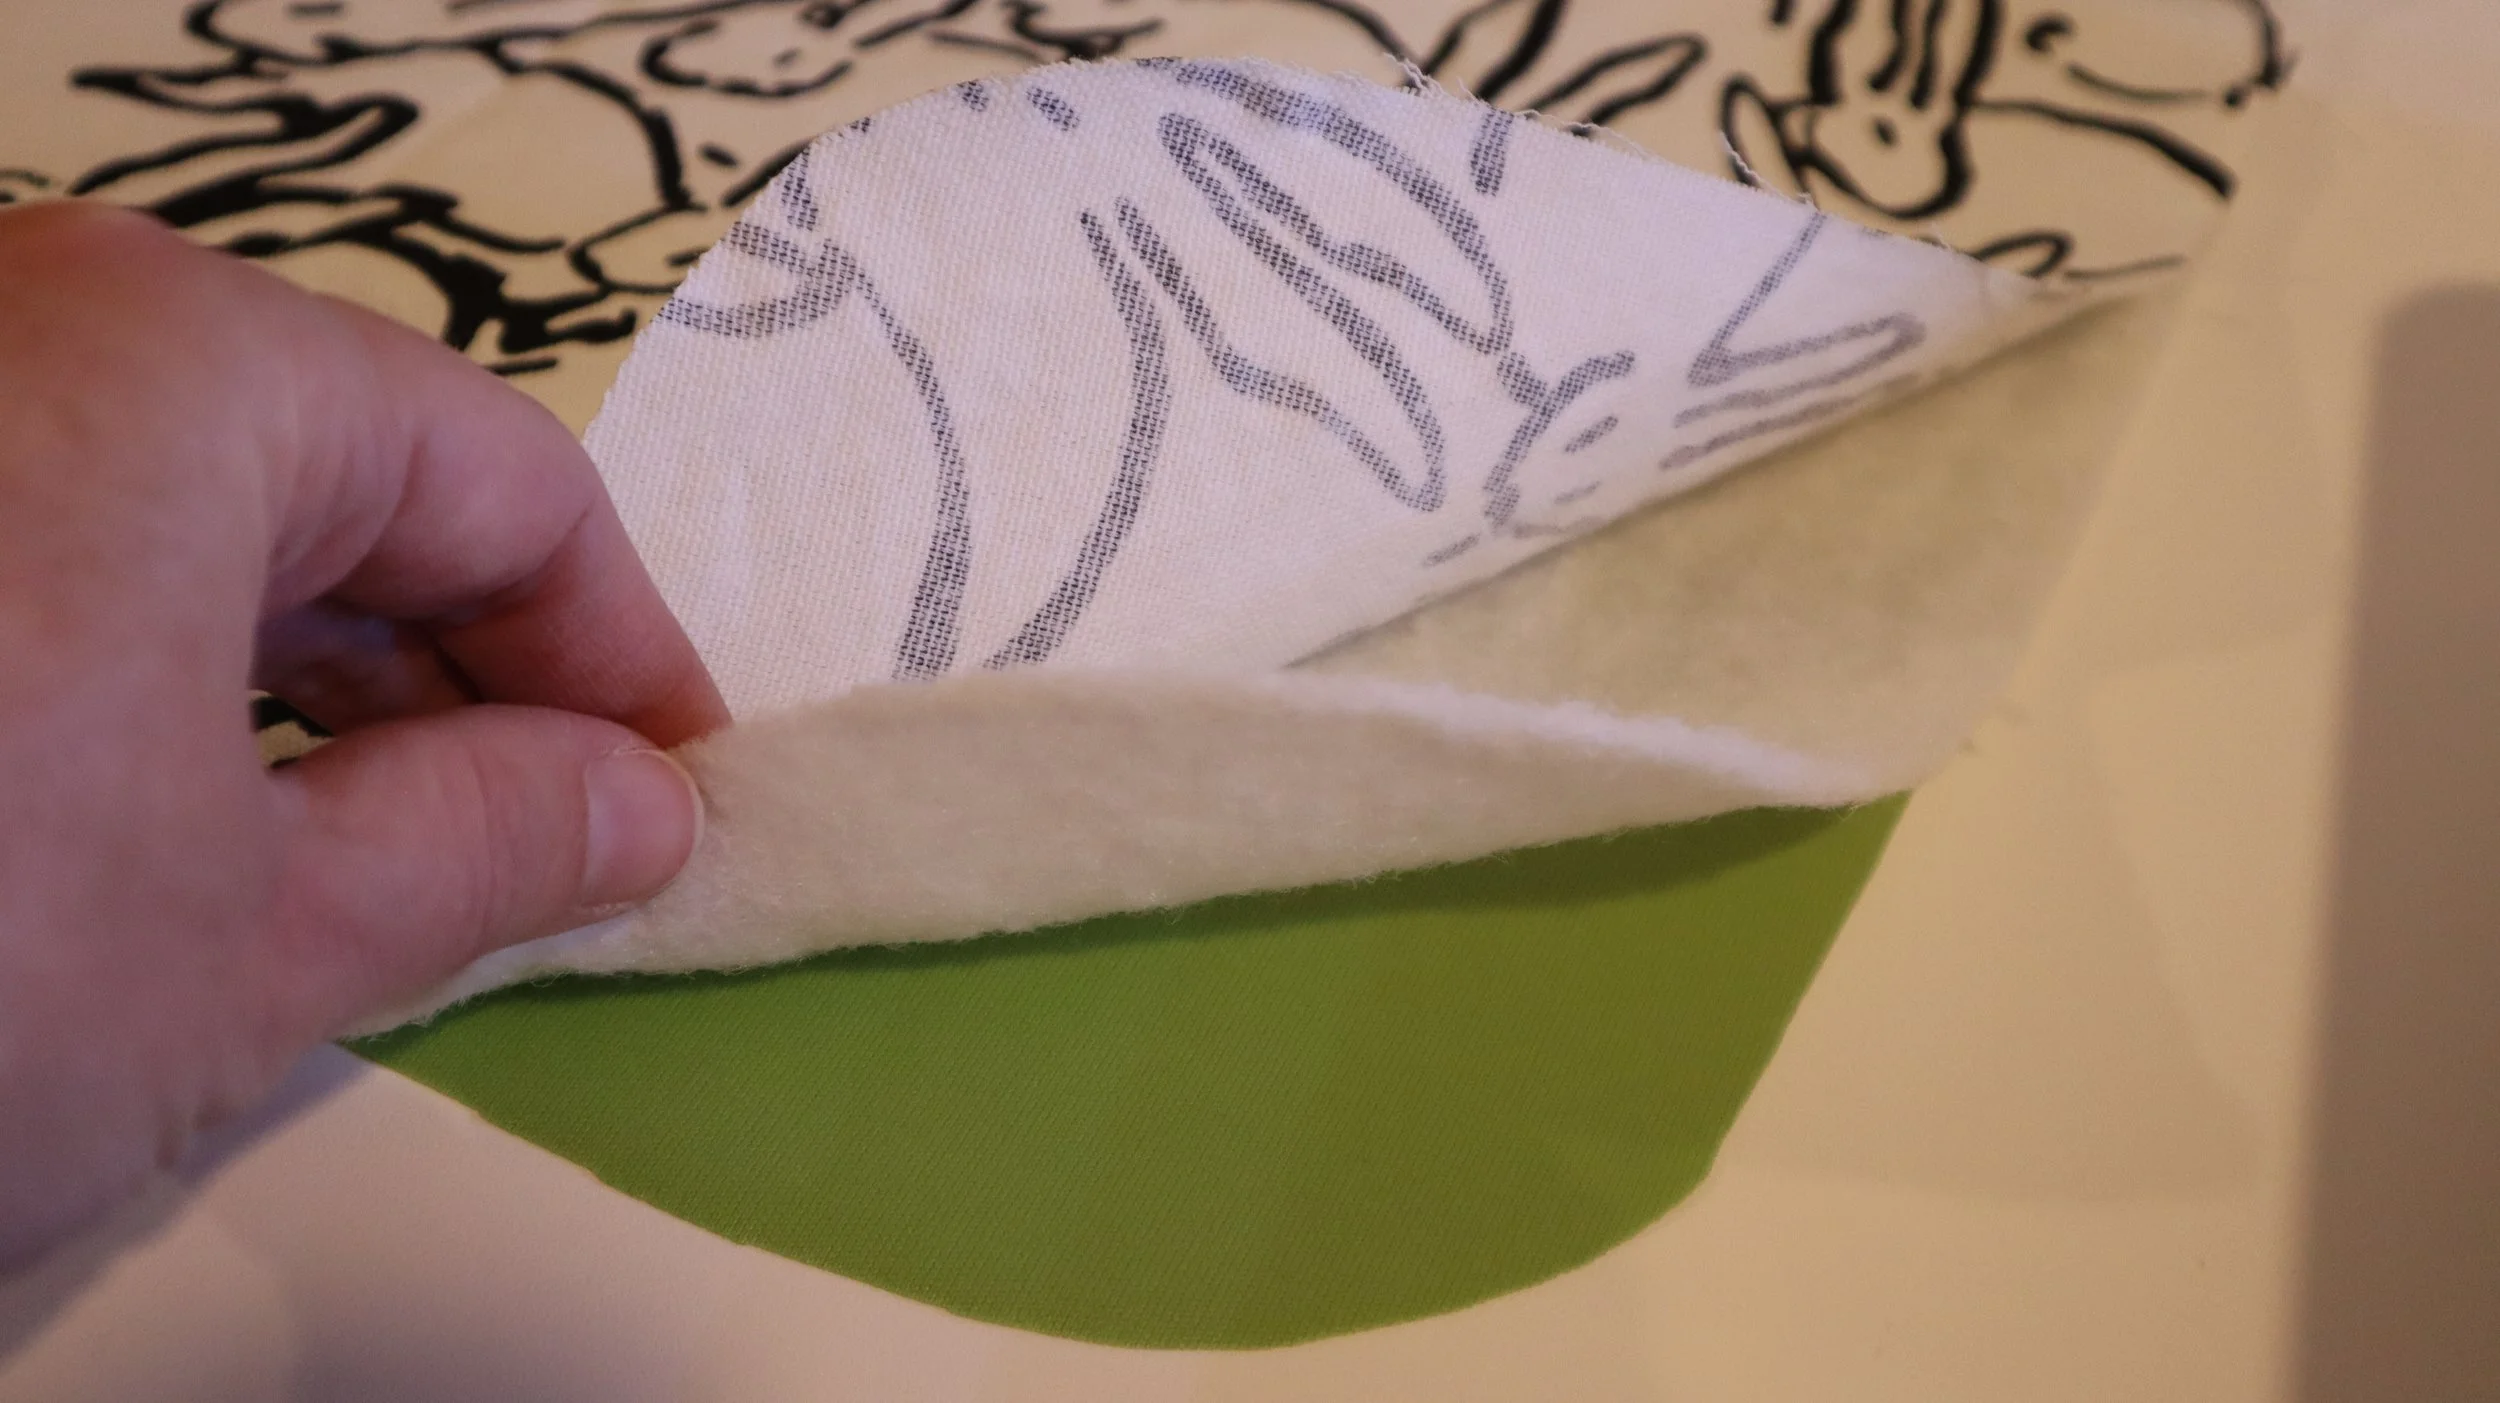
First, our supplies. You’ll need some sort of waterproof fabric. I used something called PUL fabric, which stands for Polyurethane Laminate. This fabric is used in modern cloth diaper making on the outside of the cloth diapers. We’ll use it on the inner layer of our changing pad. But don’t worry, the side that’s laminated with polyurethane will be facing the interior layers of our changing pad and won’t come into direct contact with baby’s skin.

Next, we need an outer layer of something a bit more durable. I used this home decor weight fabric from Hobby Lobby. It’s 100% cotton, so I pre-washed and dried it in case of shrinking.
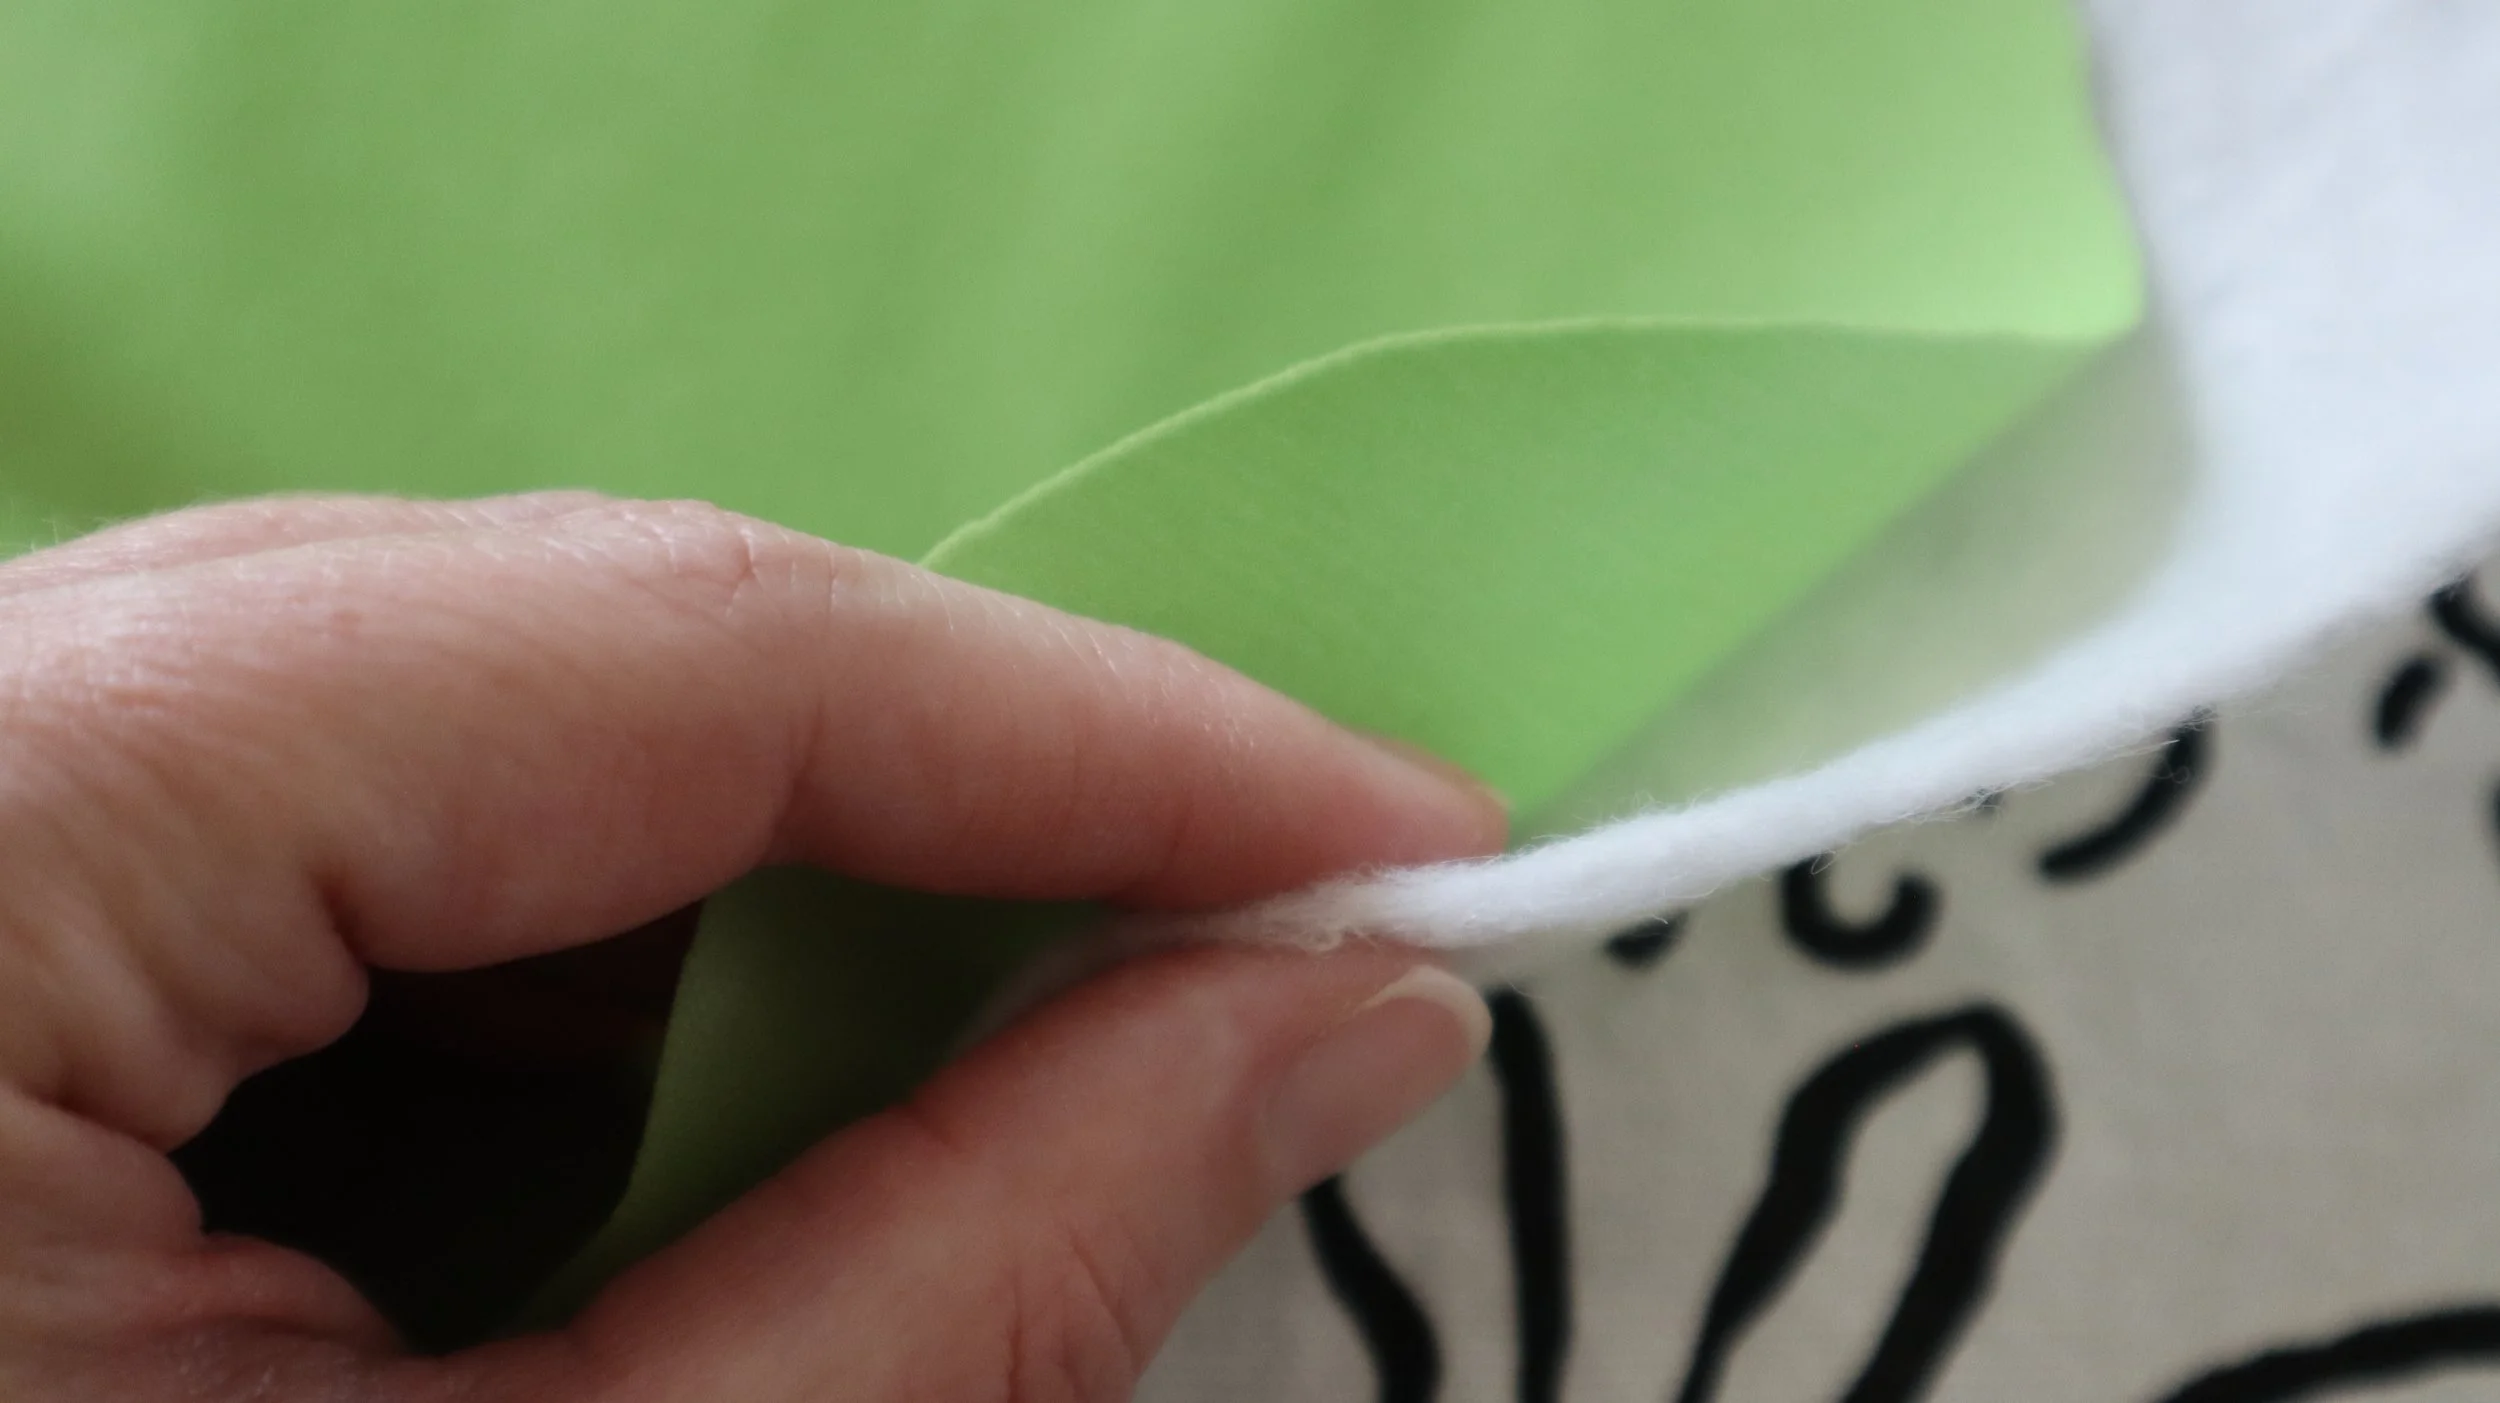
I also recommend a layer of thin batting. I used this needle-felted polyester from hobby lobby. It’s a little thinner in weight than a cotton batting, but you could use that instead if you prefer.

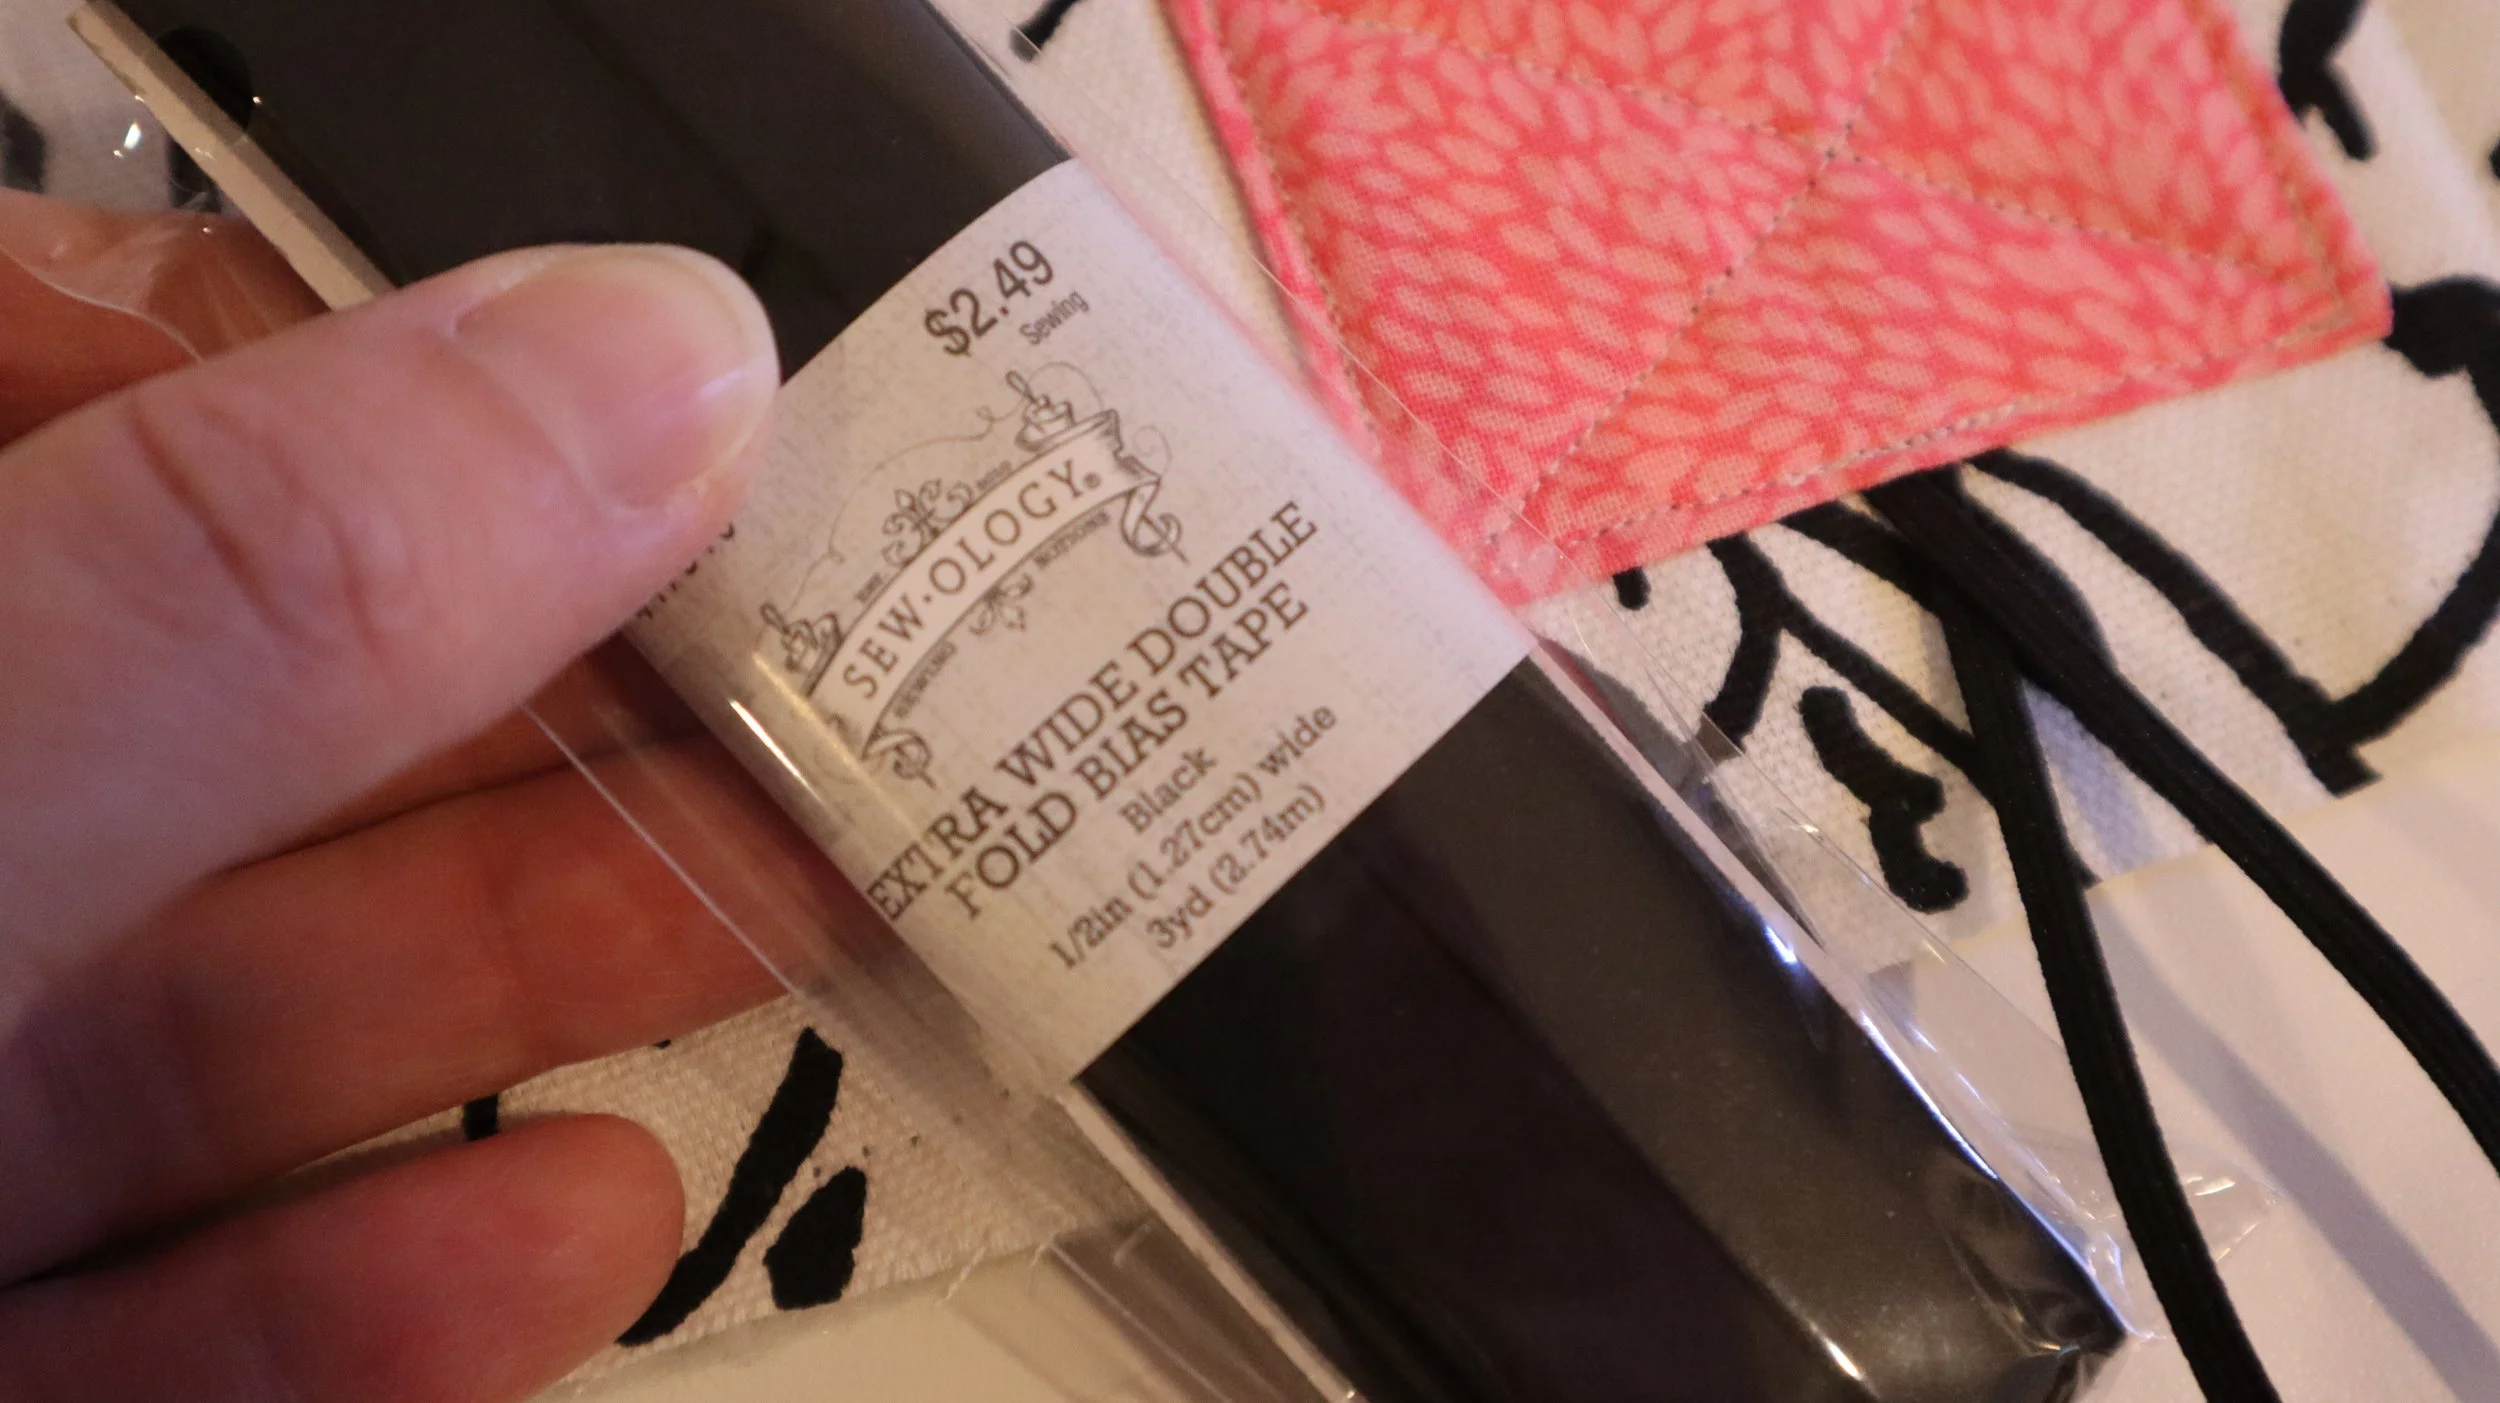
For notions, we need some double fold bias tape (about 3 1/2 yards), a large button, 5-7 inches of skinny elastic, and a small scrap of coordinating fabric. I also recommend a ball point needle, as that is what is going to sew through the PUL fabric the best.
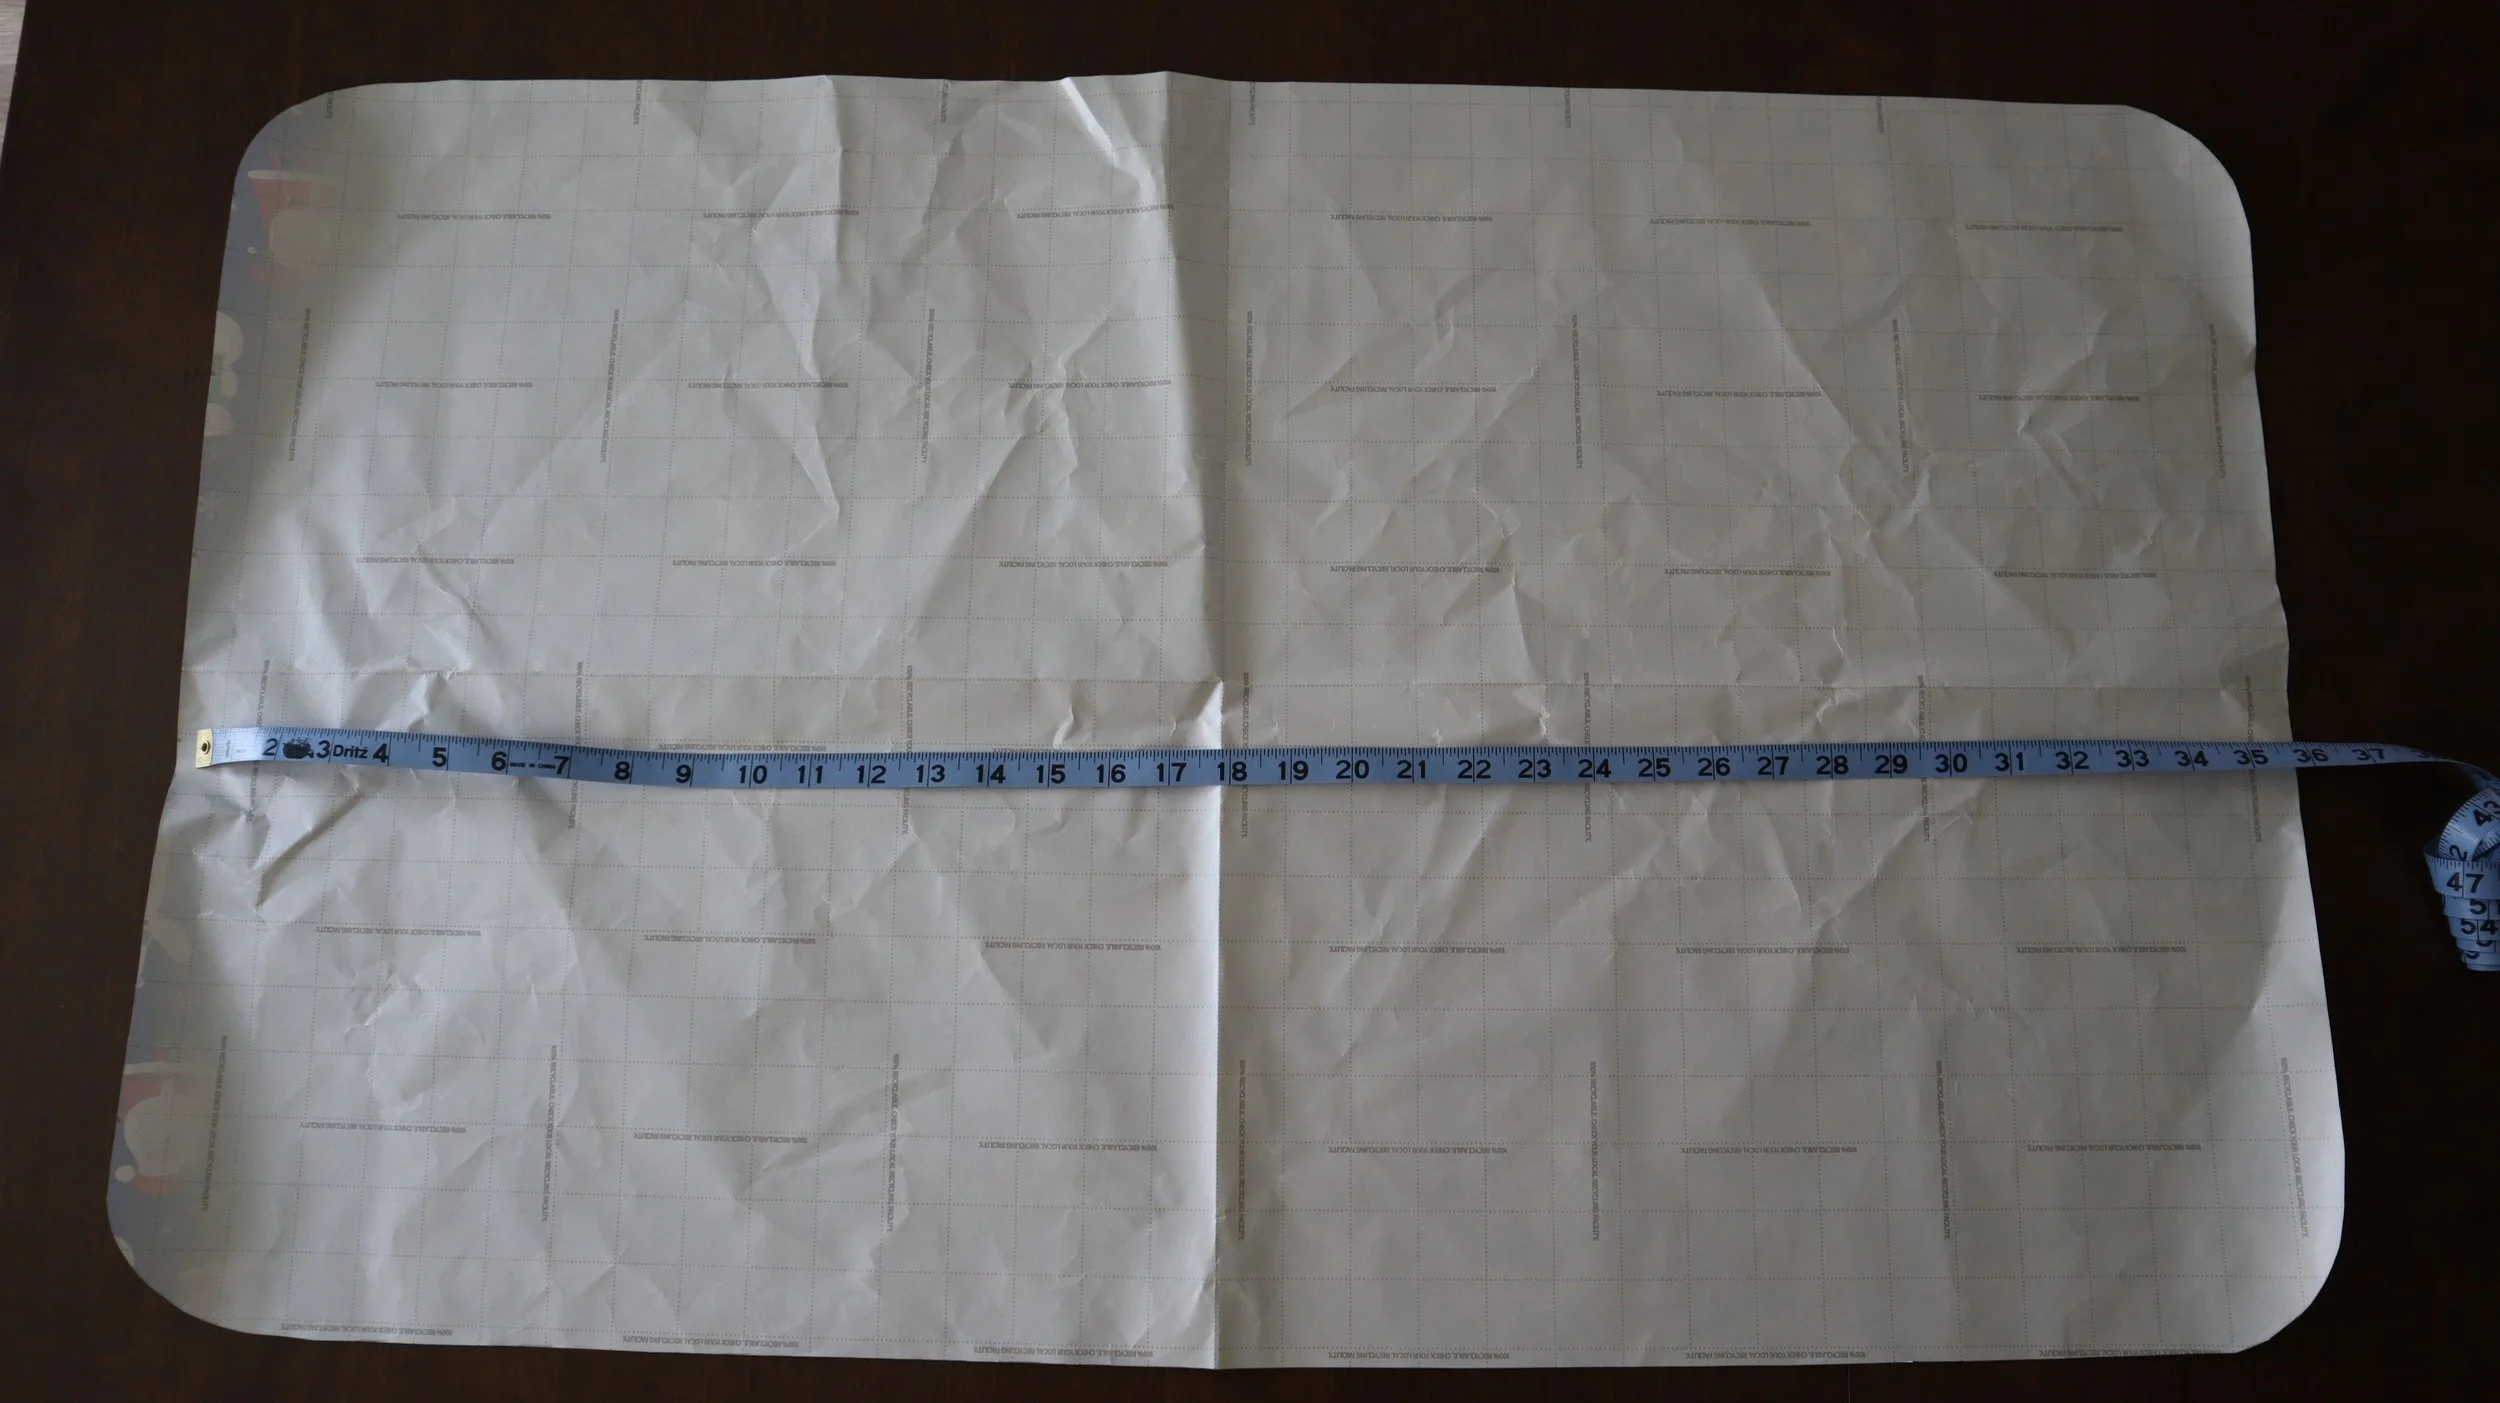
Let’s get to cutting out our fabric and batting. I like to use old wrapping paper to make a pattern for myself. For this travel changing pad, I cut a rectangle that is 22 by 36 inches. Then I used a cup and traced it to round off the edges. Once I’d made my pattern, I cut one piece of each from the PUL fabric, batting, and heavy cotton.
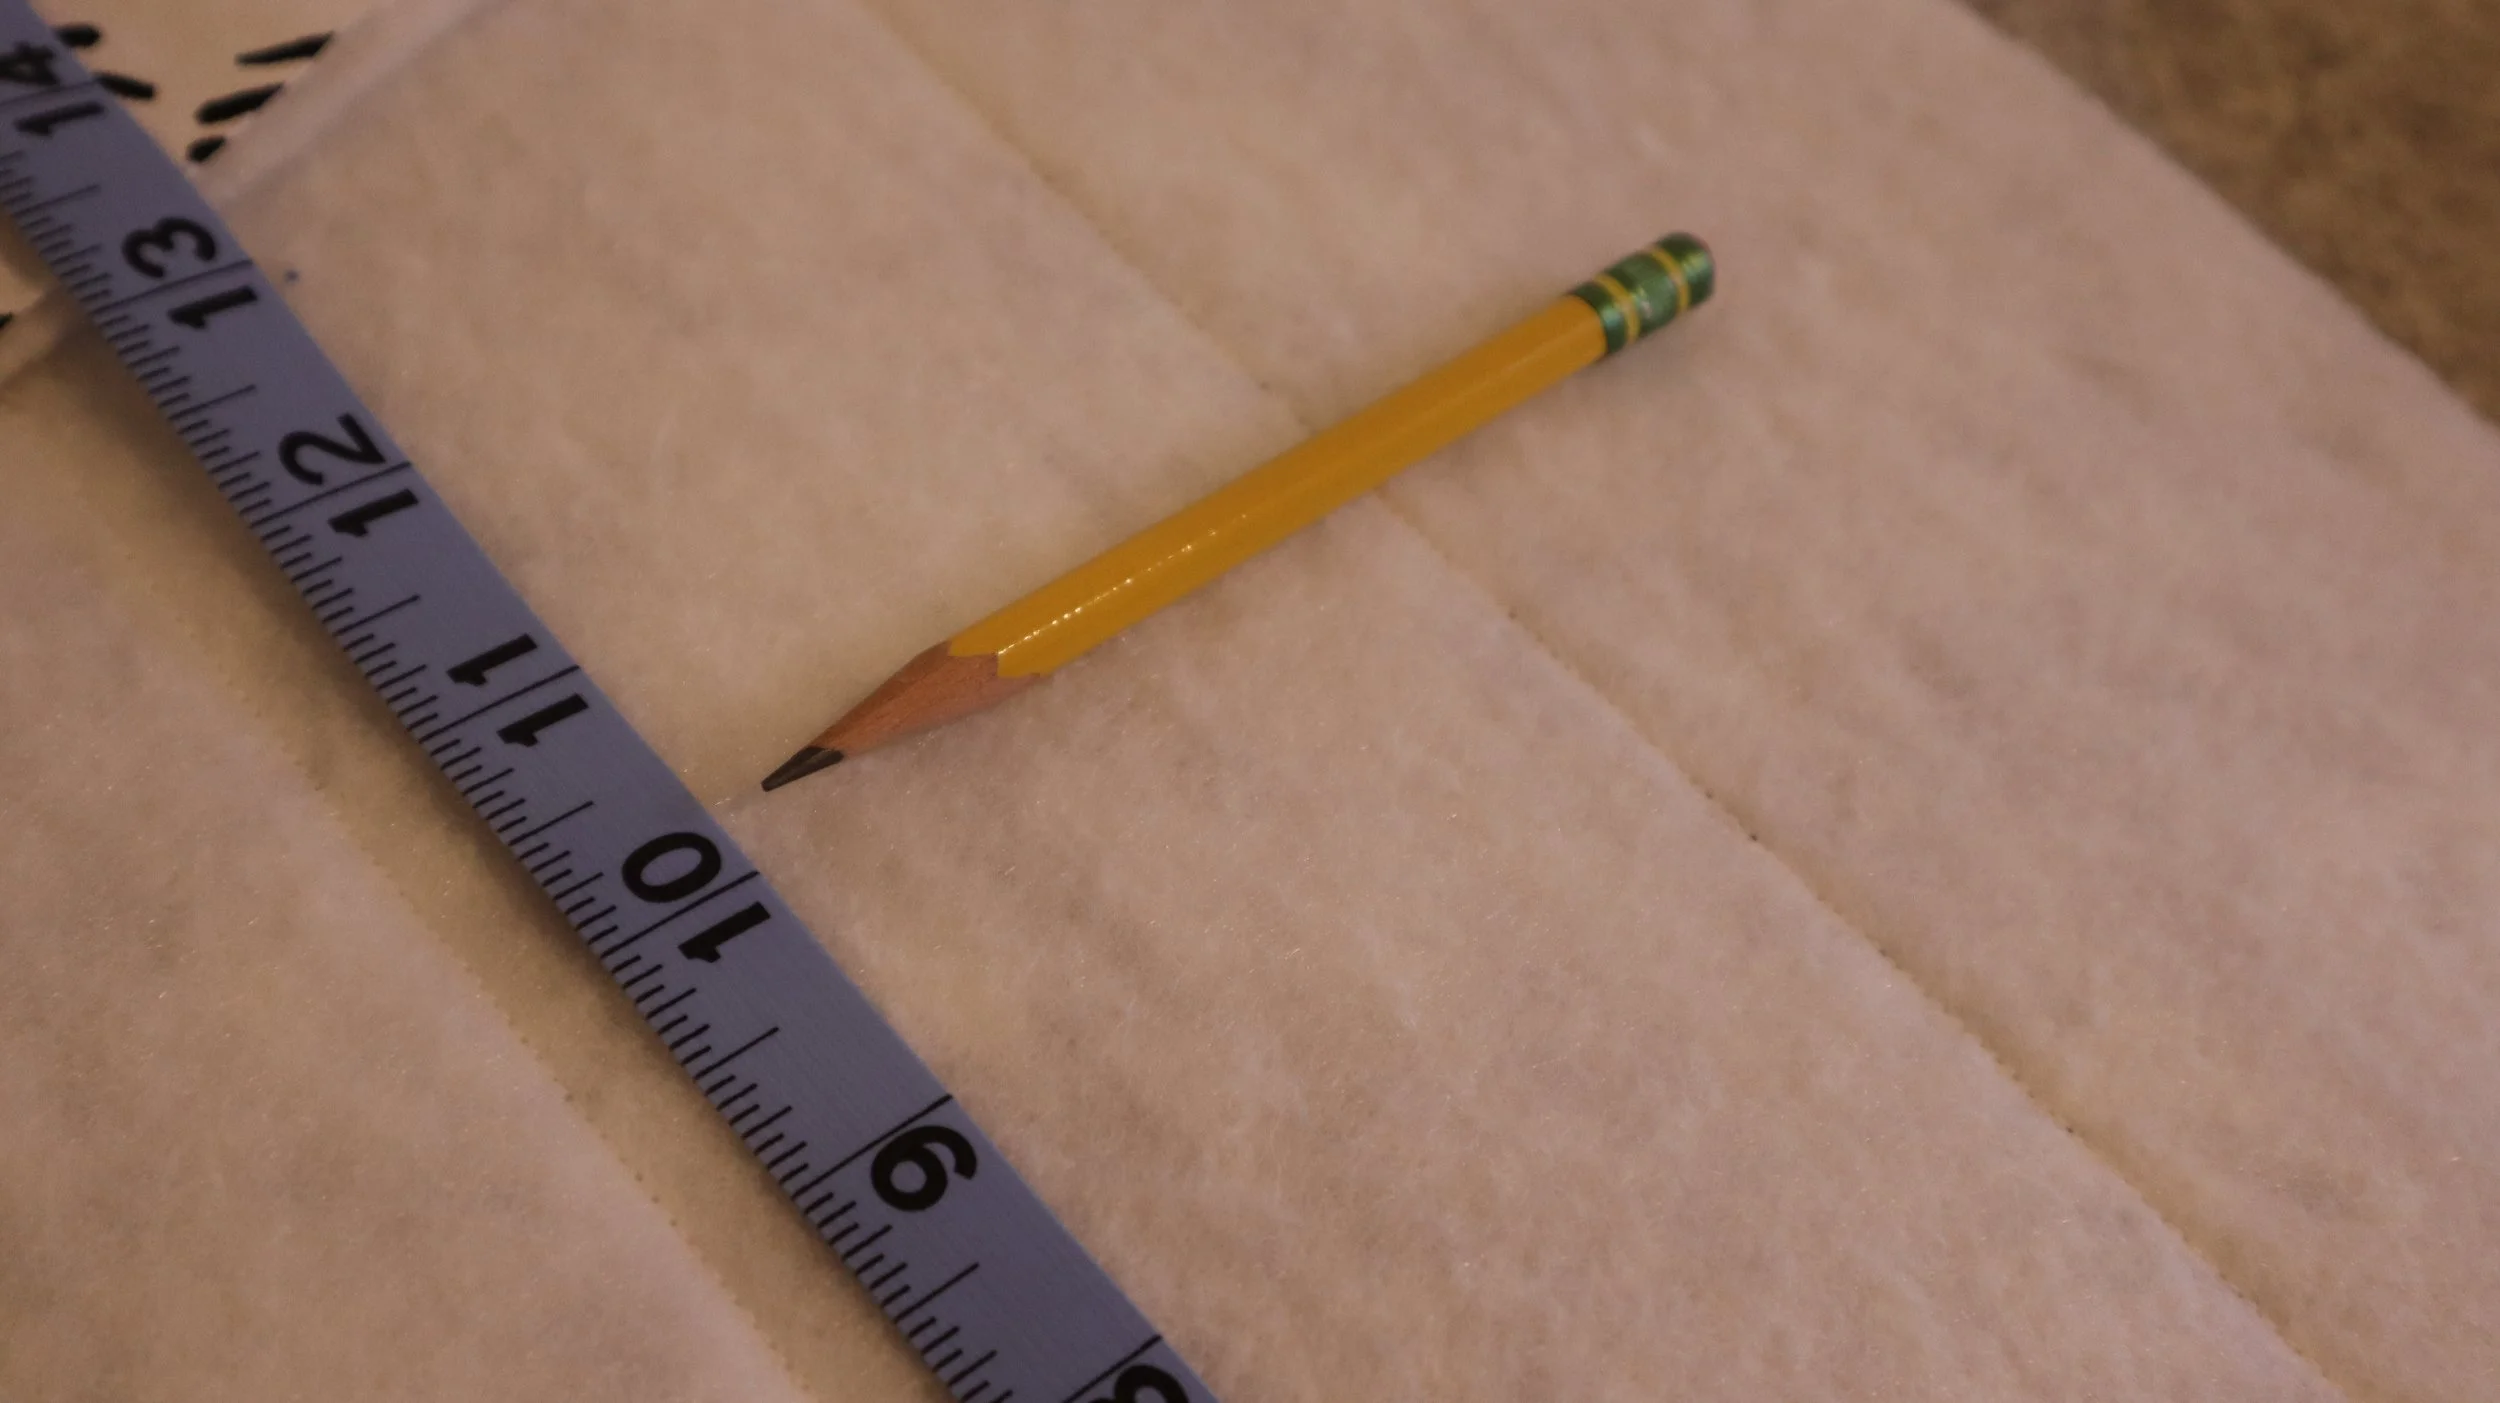
The next step is to quilt together the heavy cotton and the batting *only.* We will not be including the PUL fabric in this step because that is our waterproof layer, and we do not want to put a bunch of tiny holes from the sewing needles into the middle of our changing pad. That will only make the the batting and cotton layers more likely to get wet if an accident occurs while changing baby. I decided to quilt straight lines every 3 1/2 inches or so, longways down the changing pad. If you use a different type of batting than I did, just make sure you read the manufacturer’s recommendations as to how far apart to quilt with your batting. A travel changing pad is going to be a heavily washed item, and we want it to hold up well in the washer and dryer.

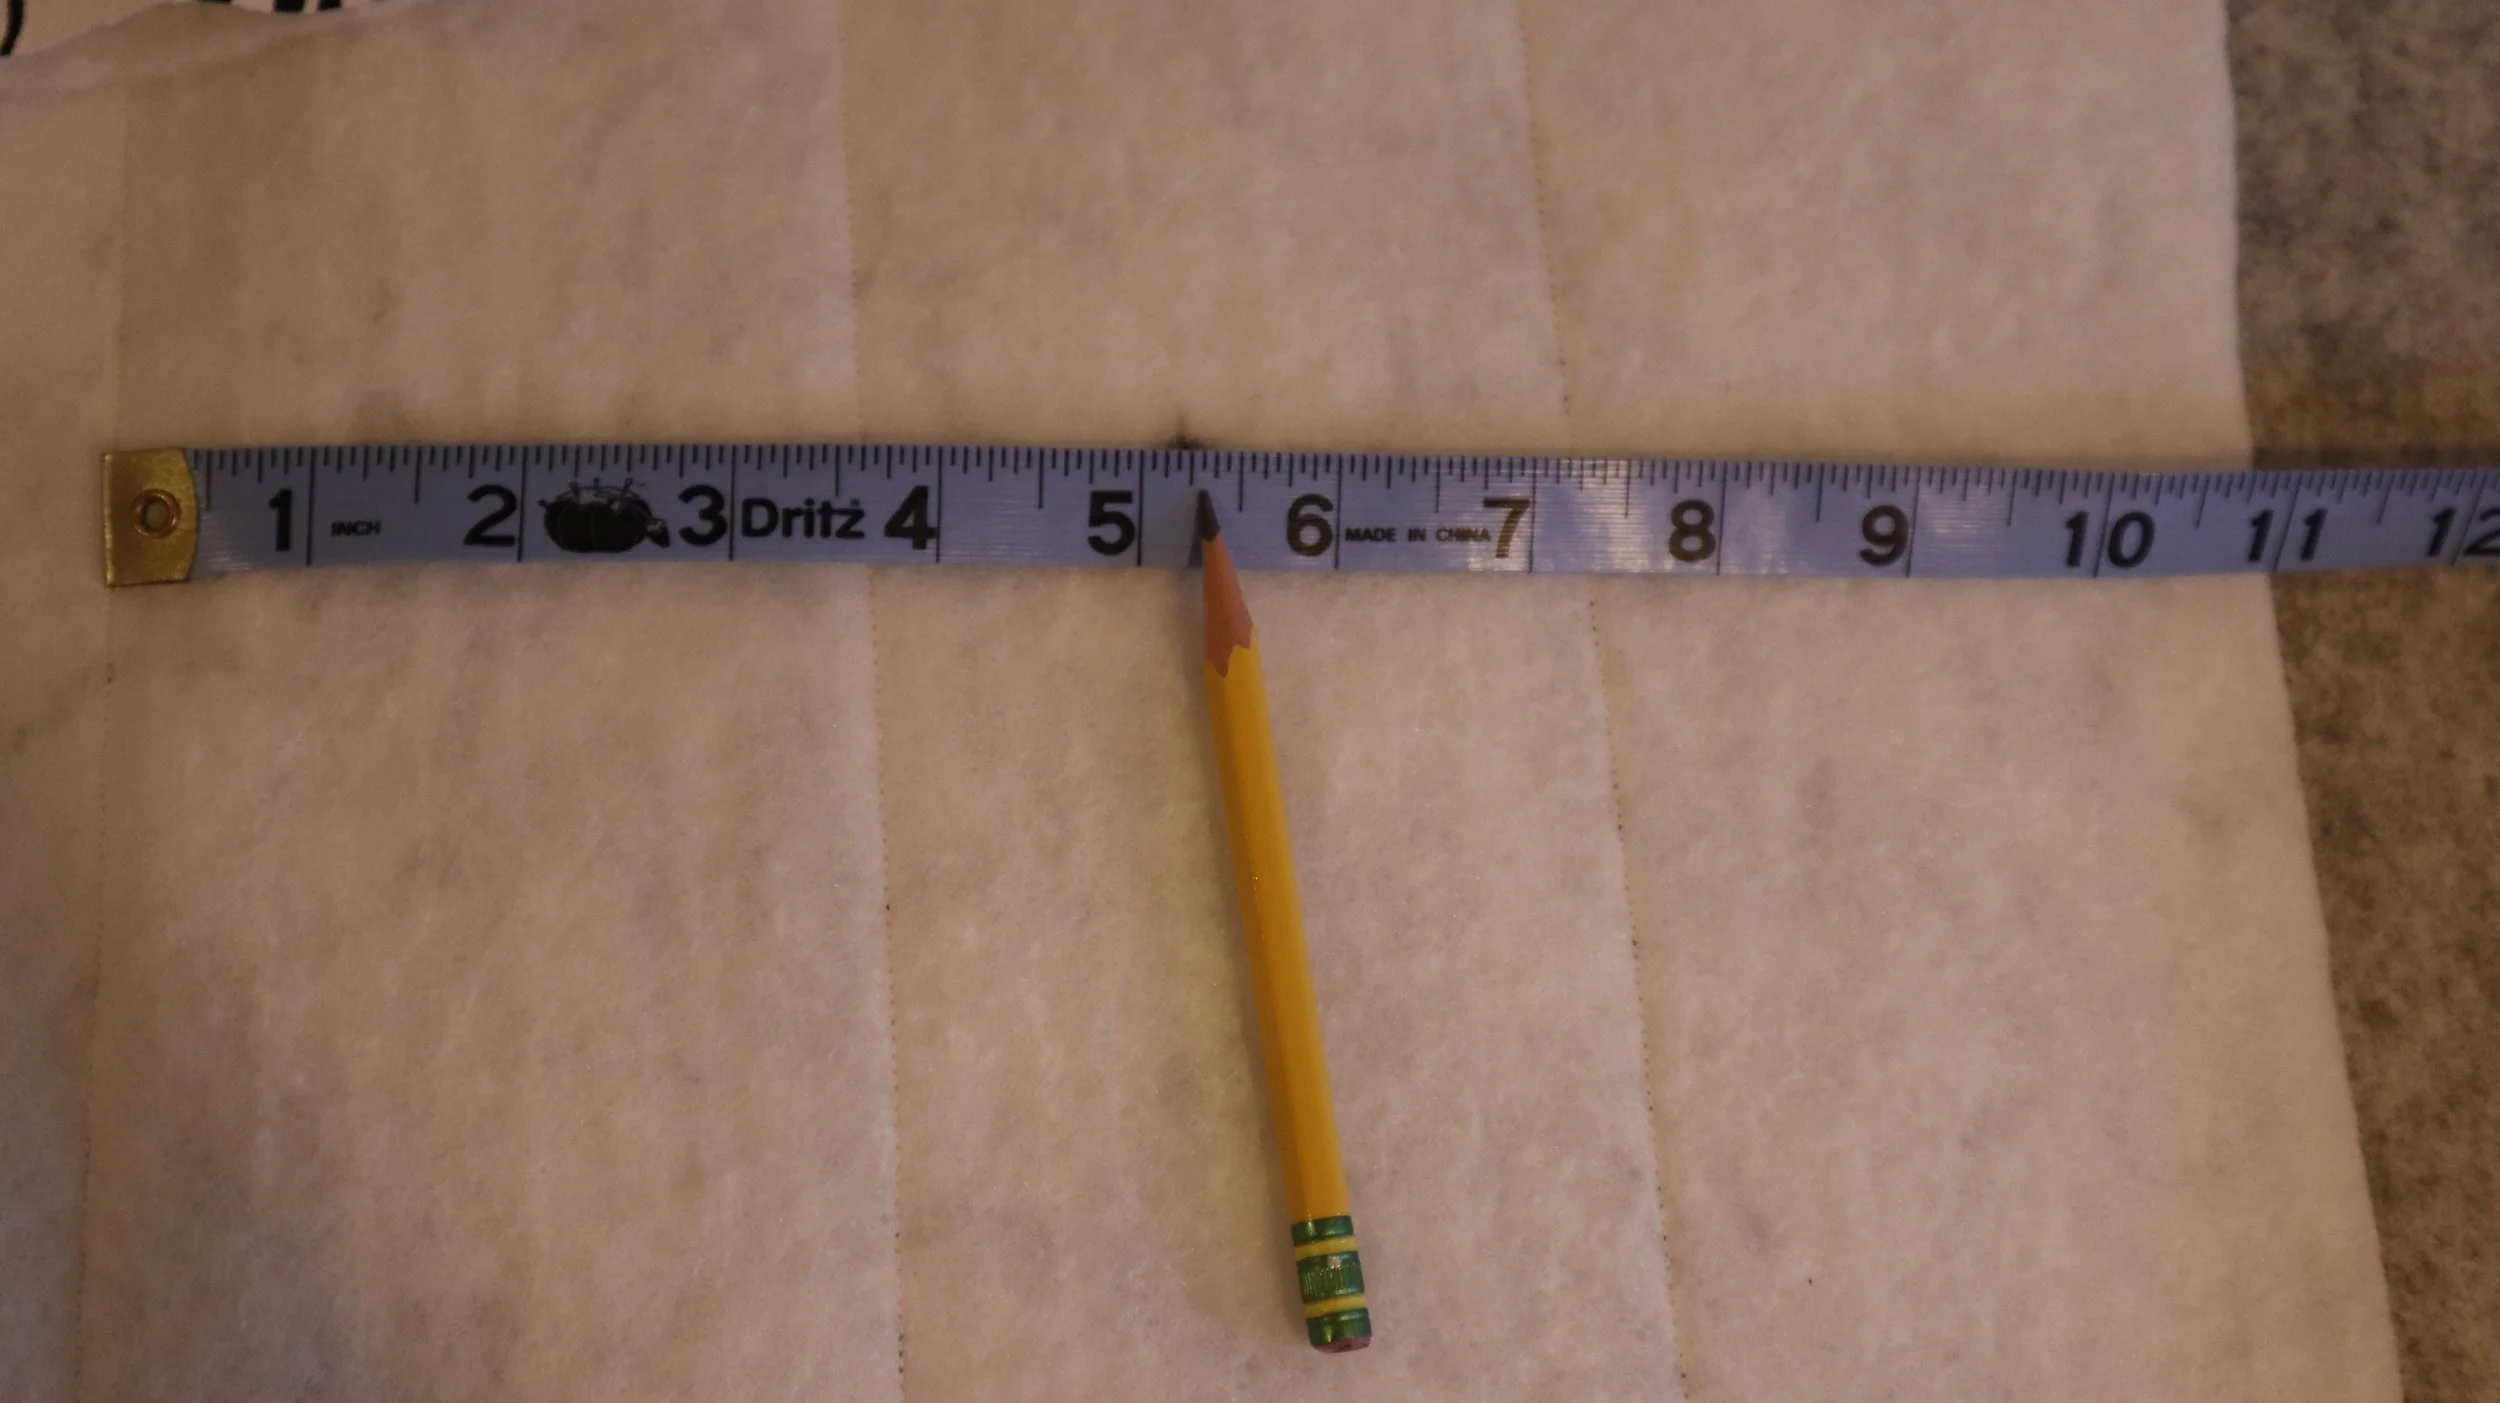
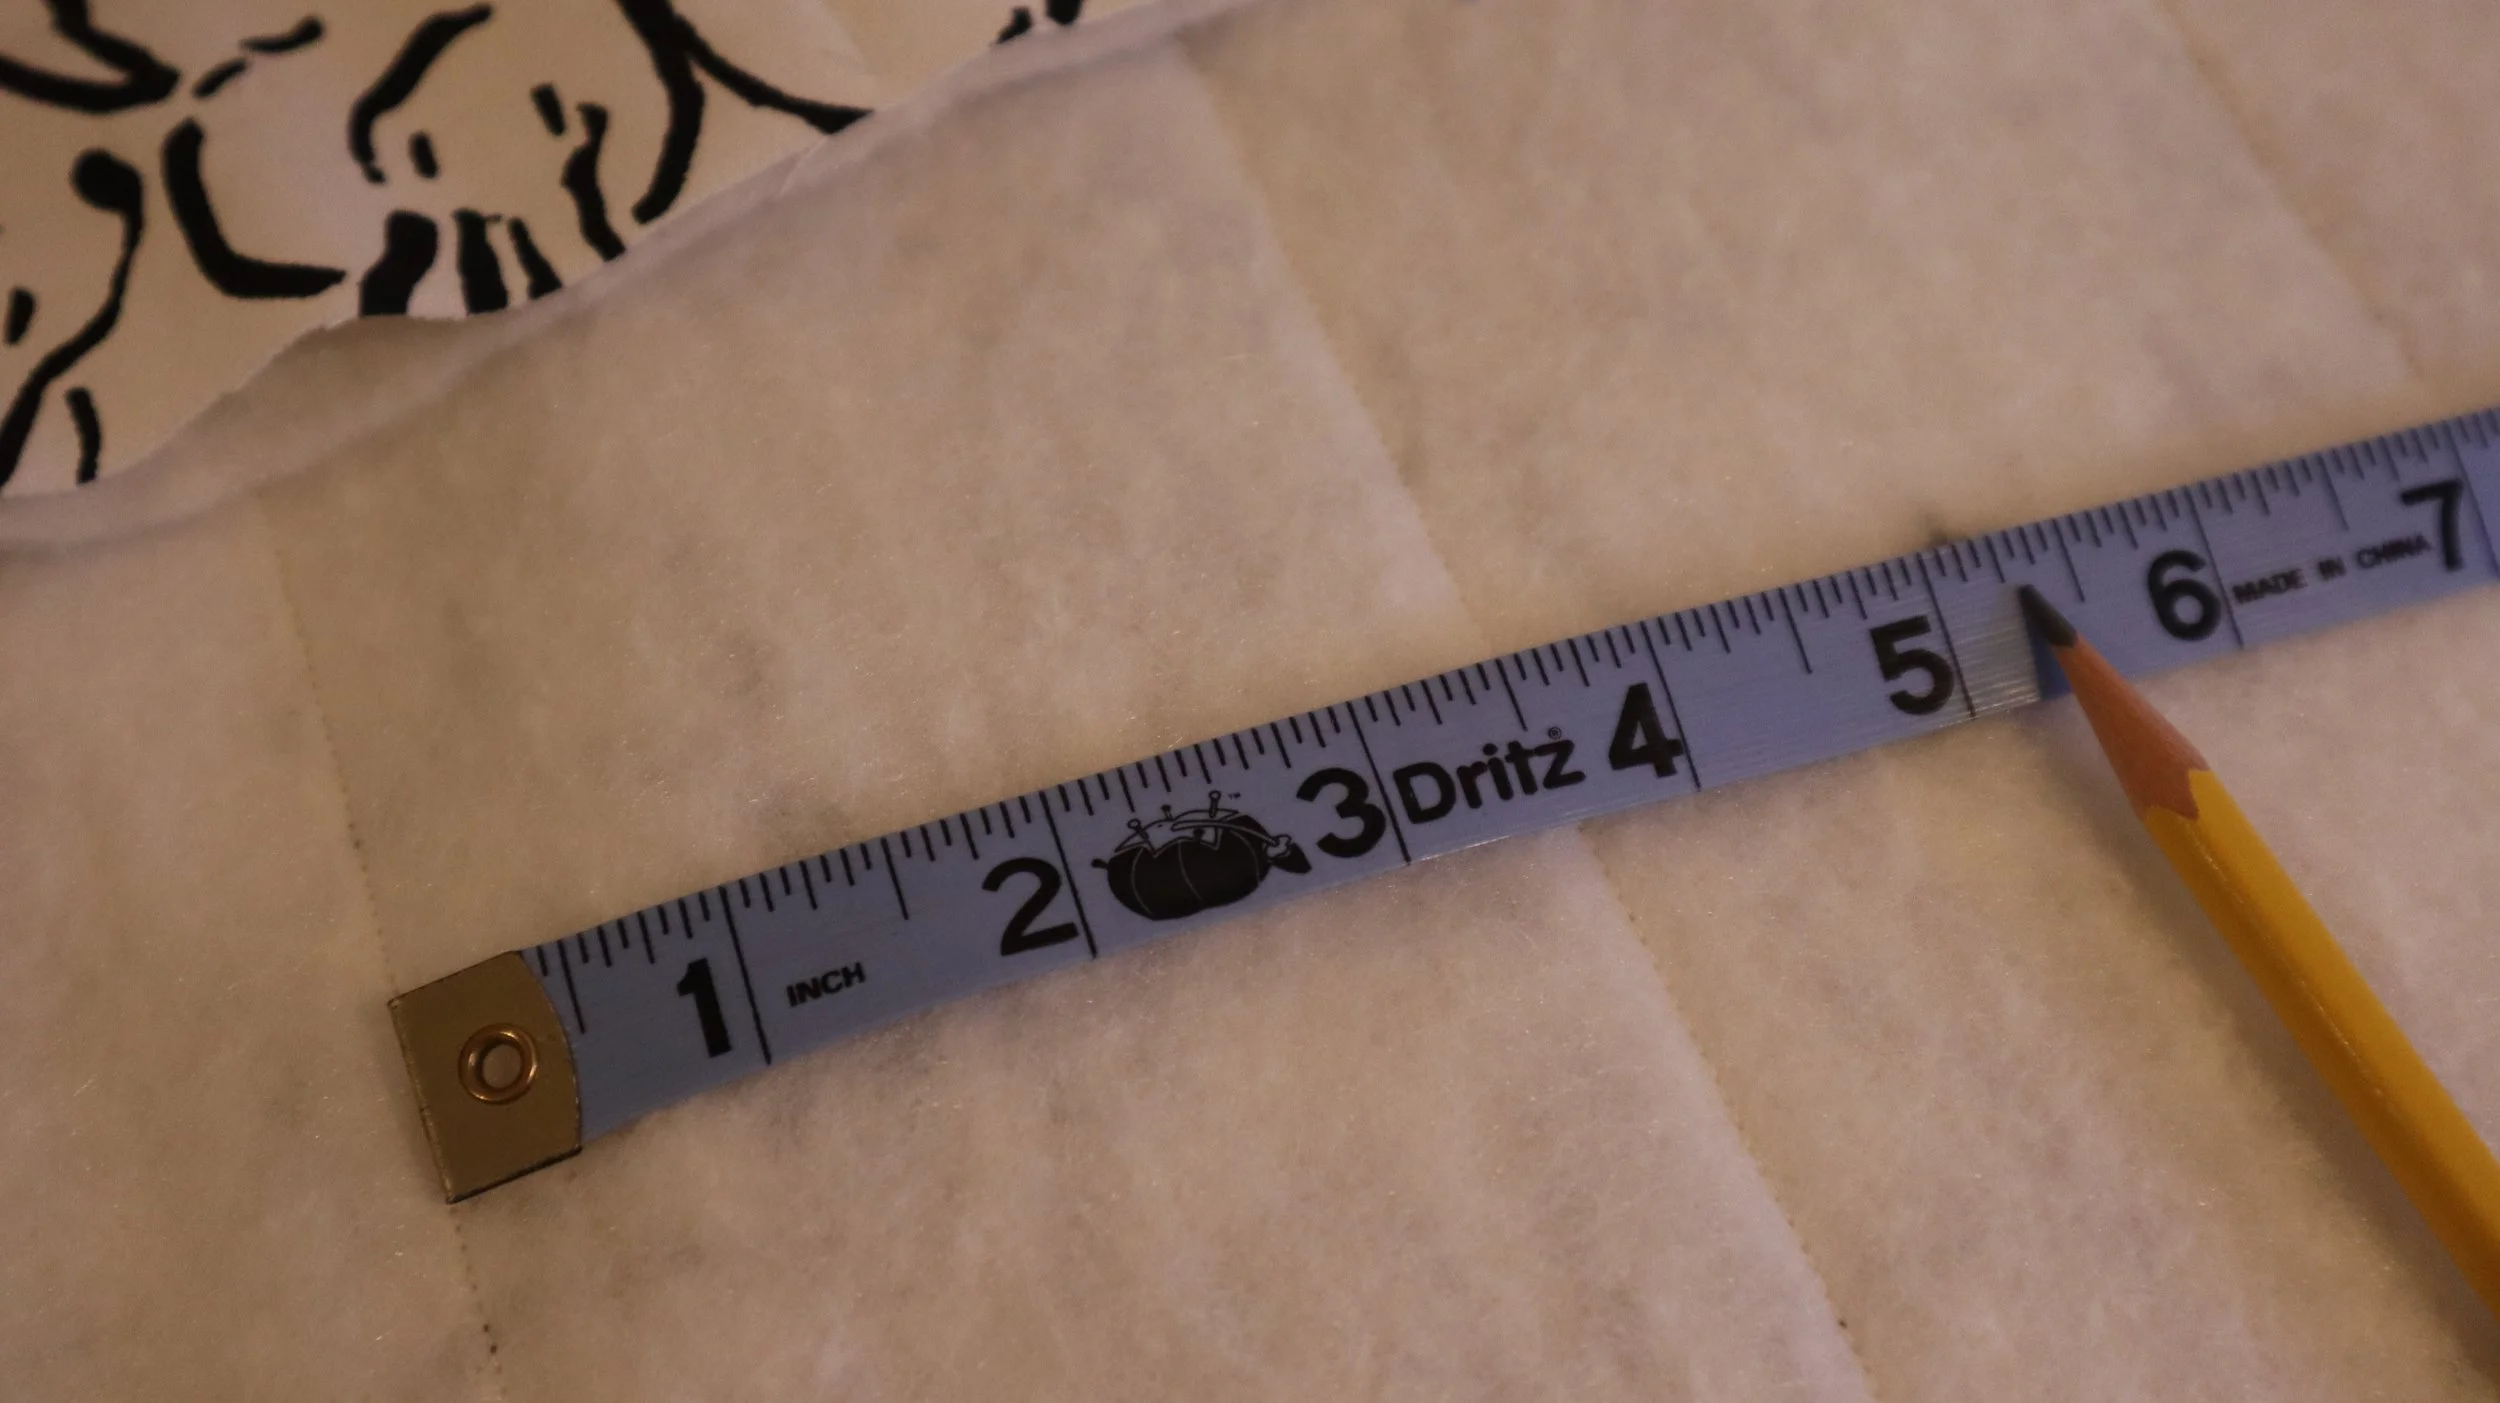
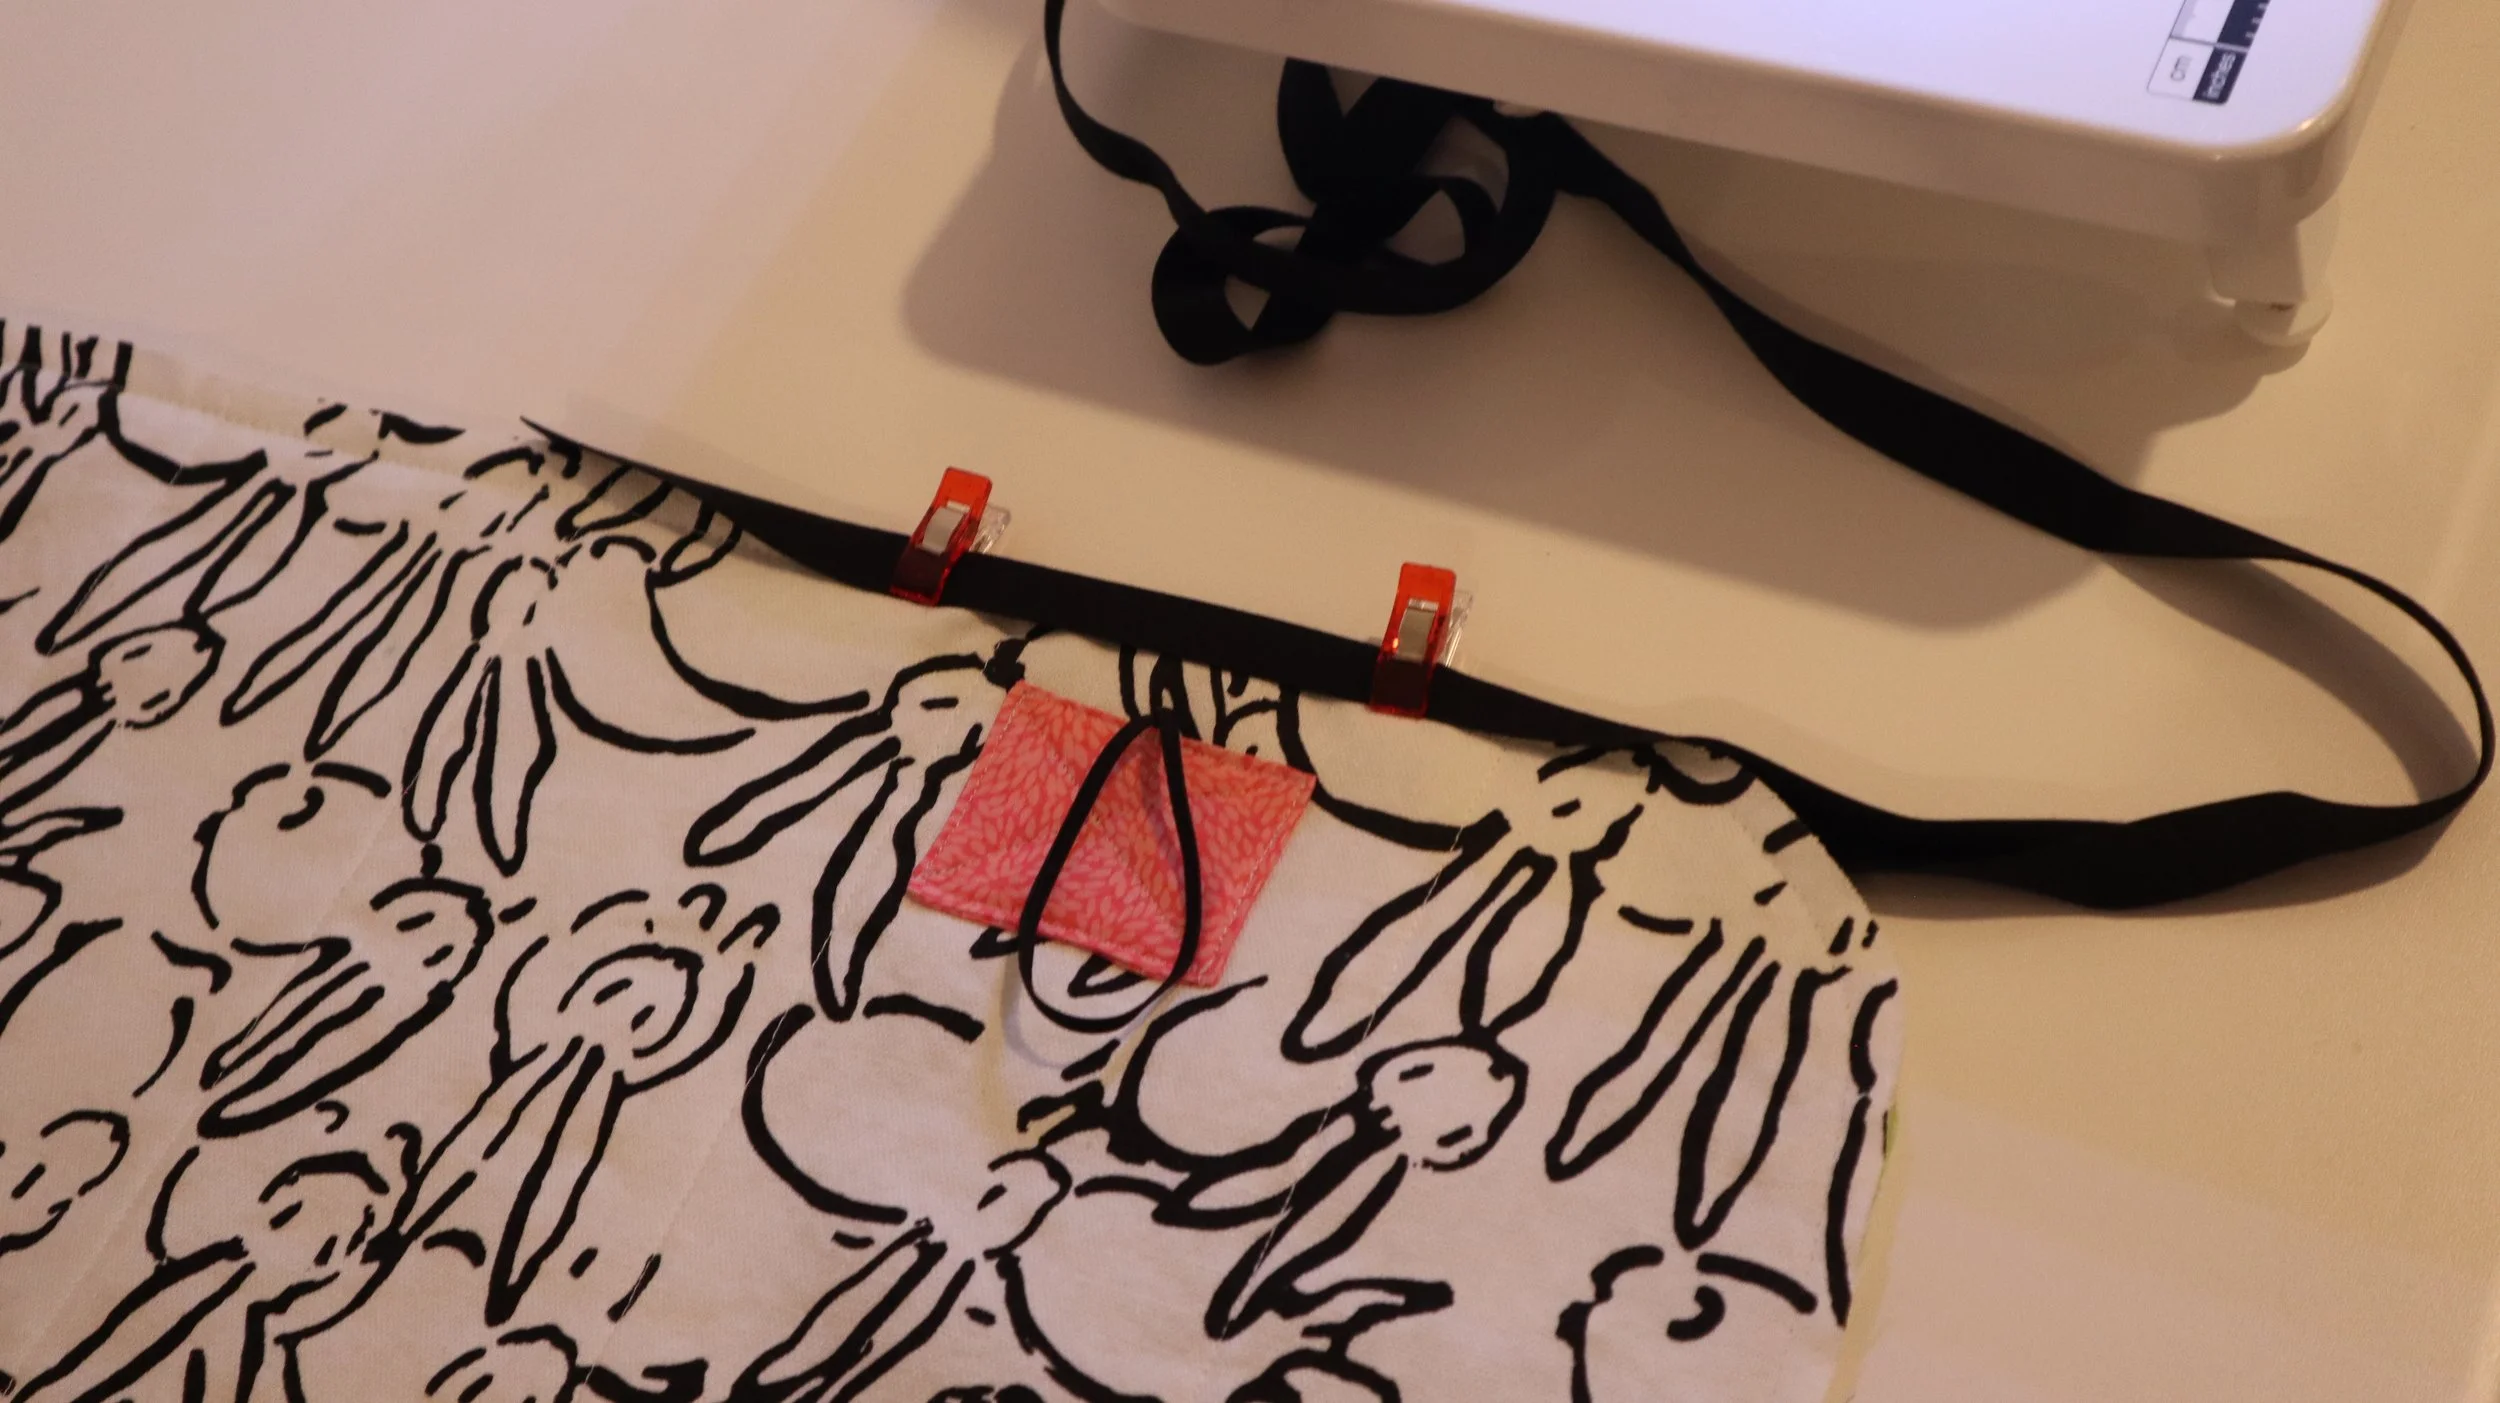
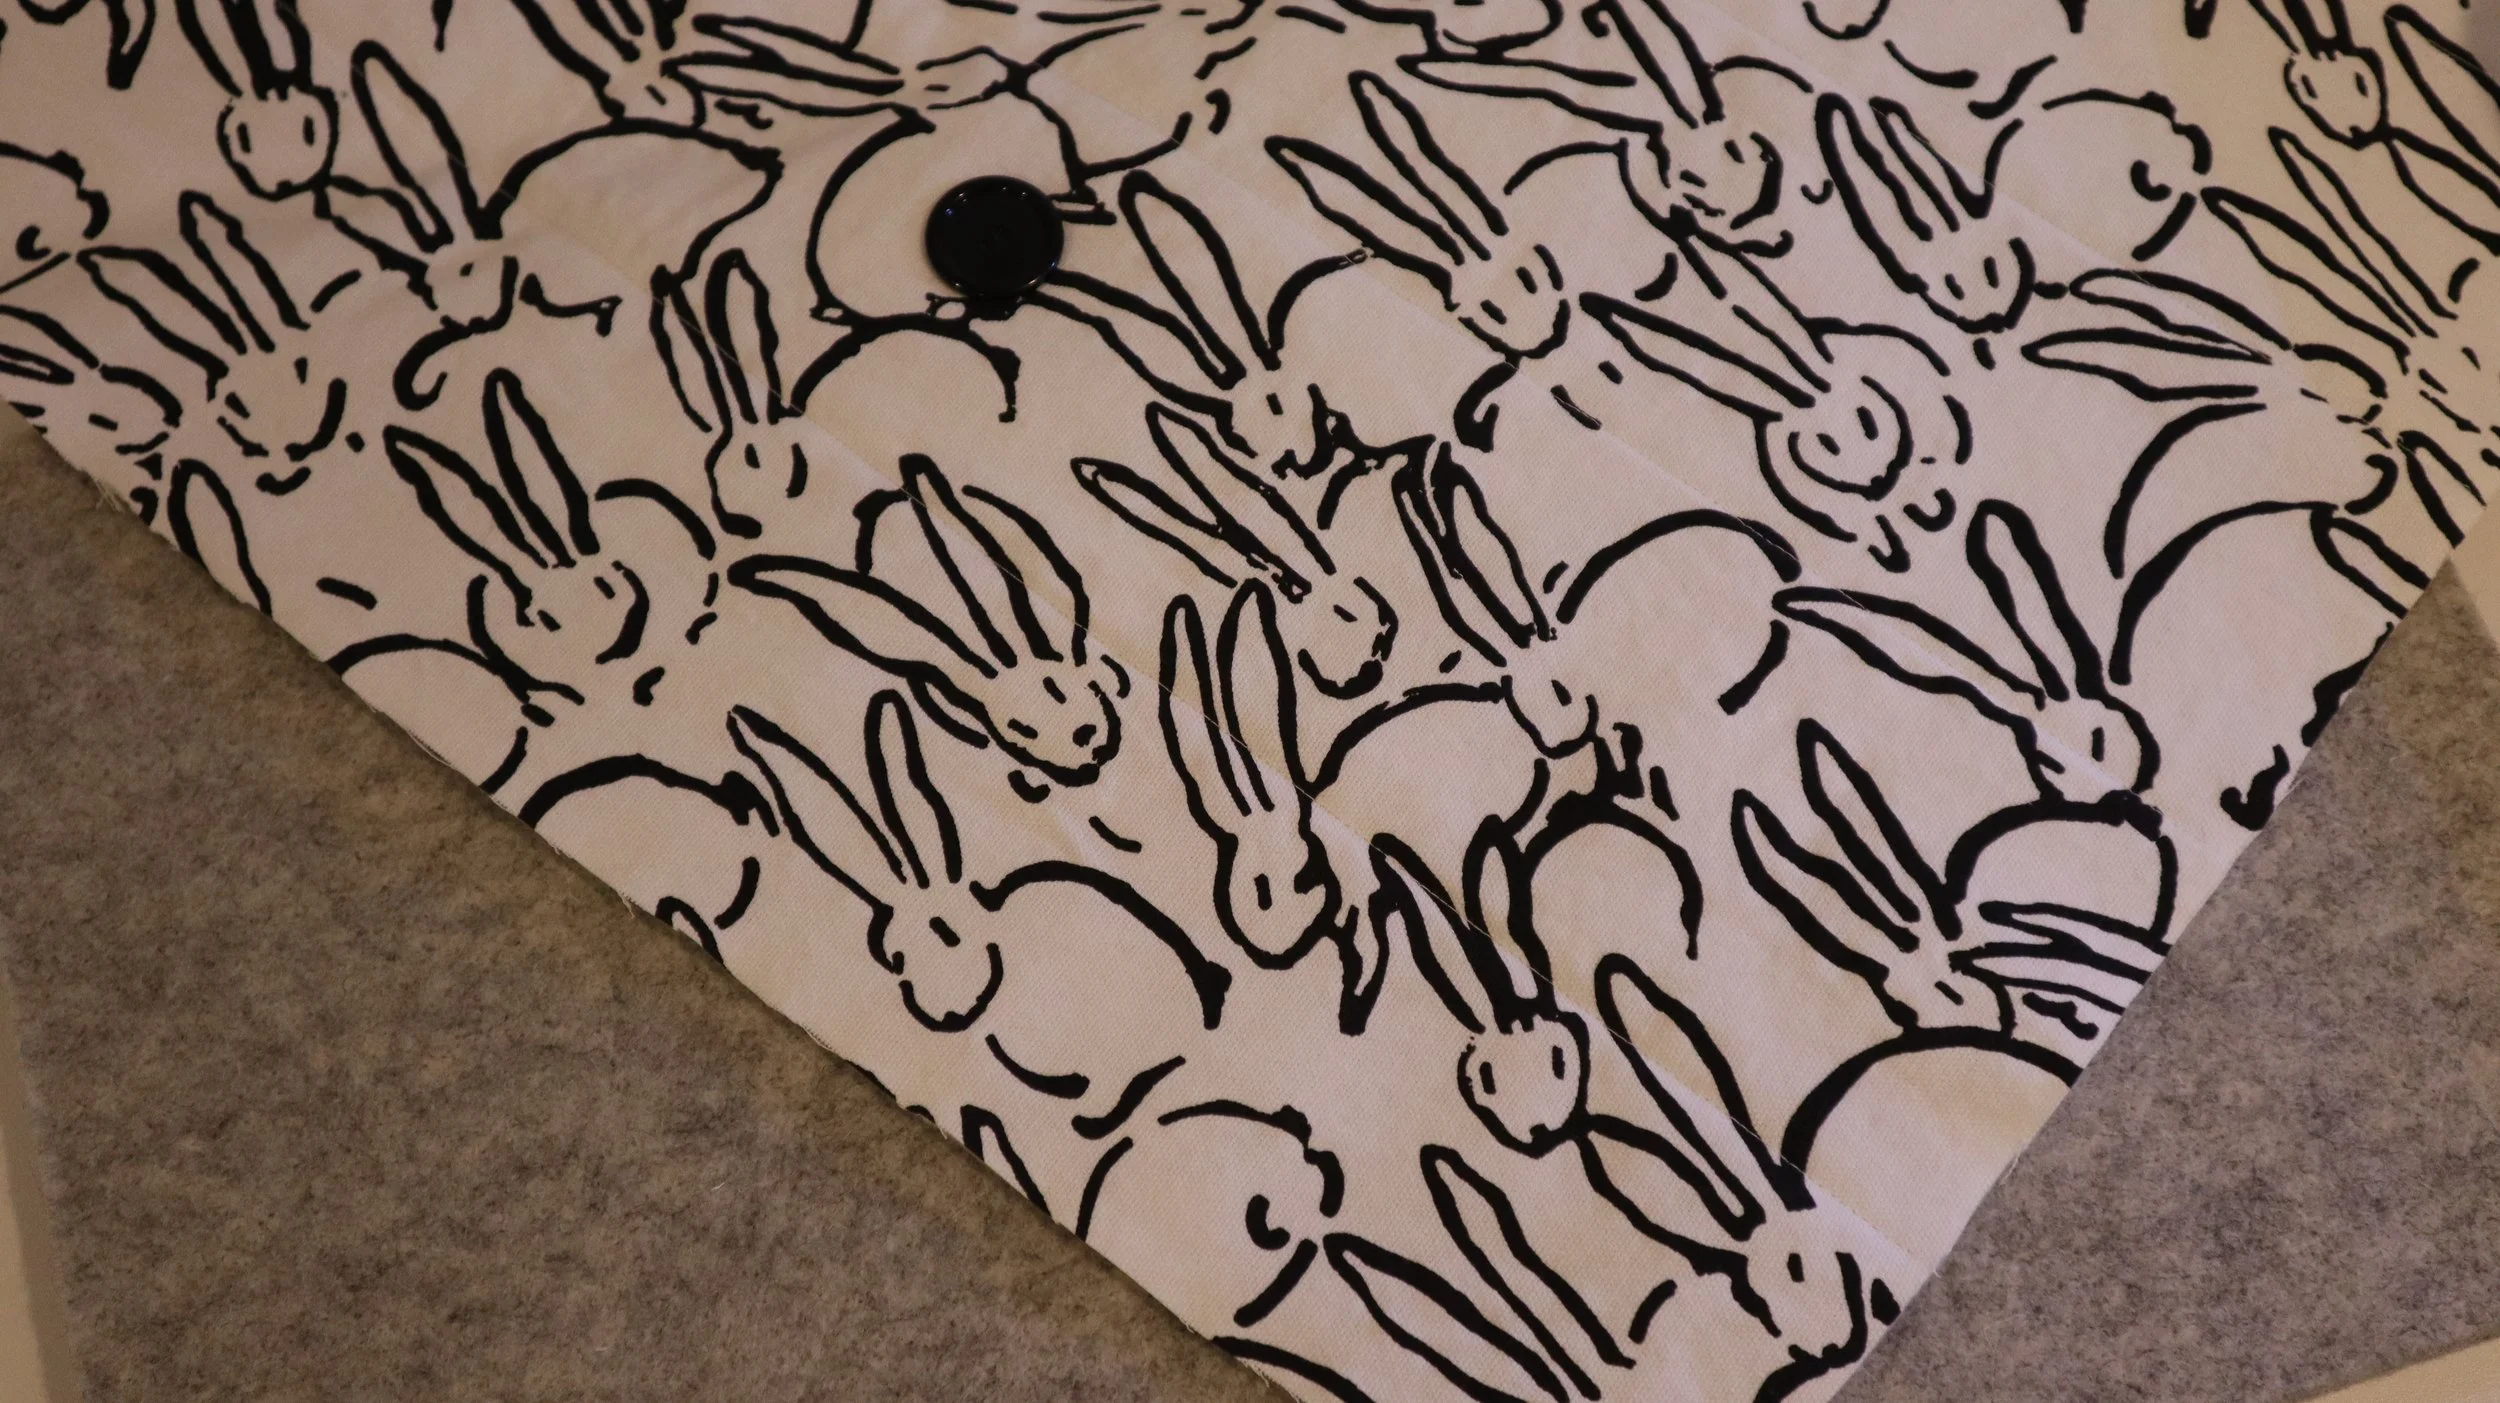
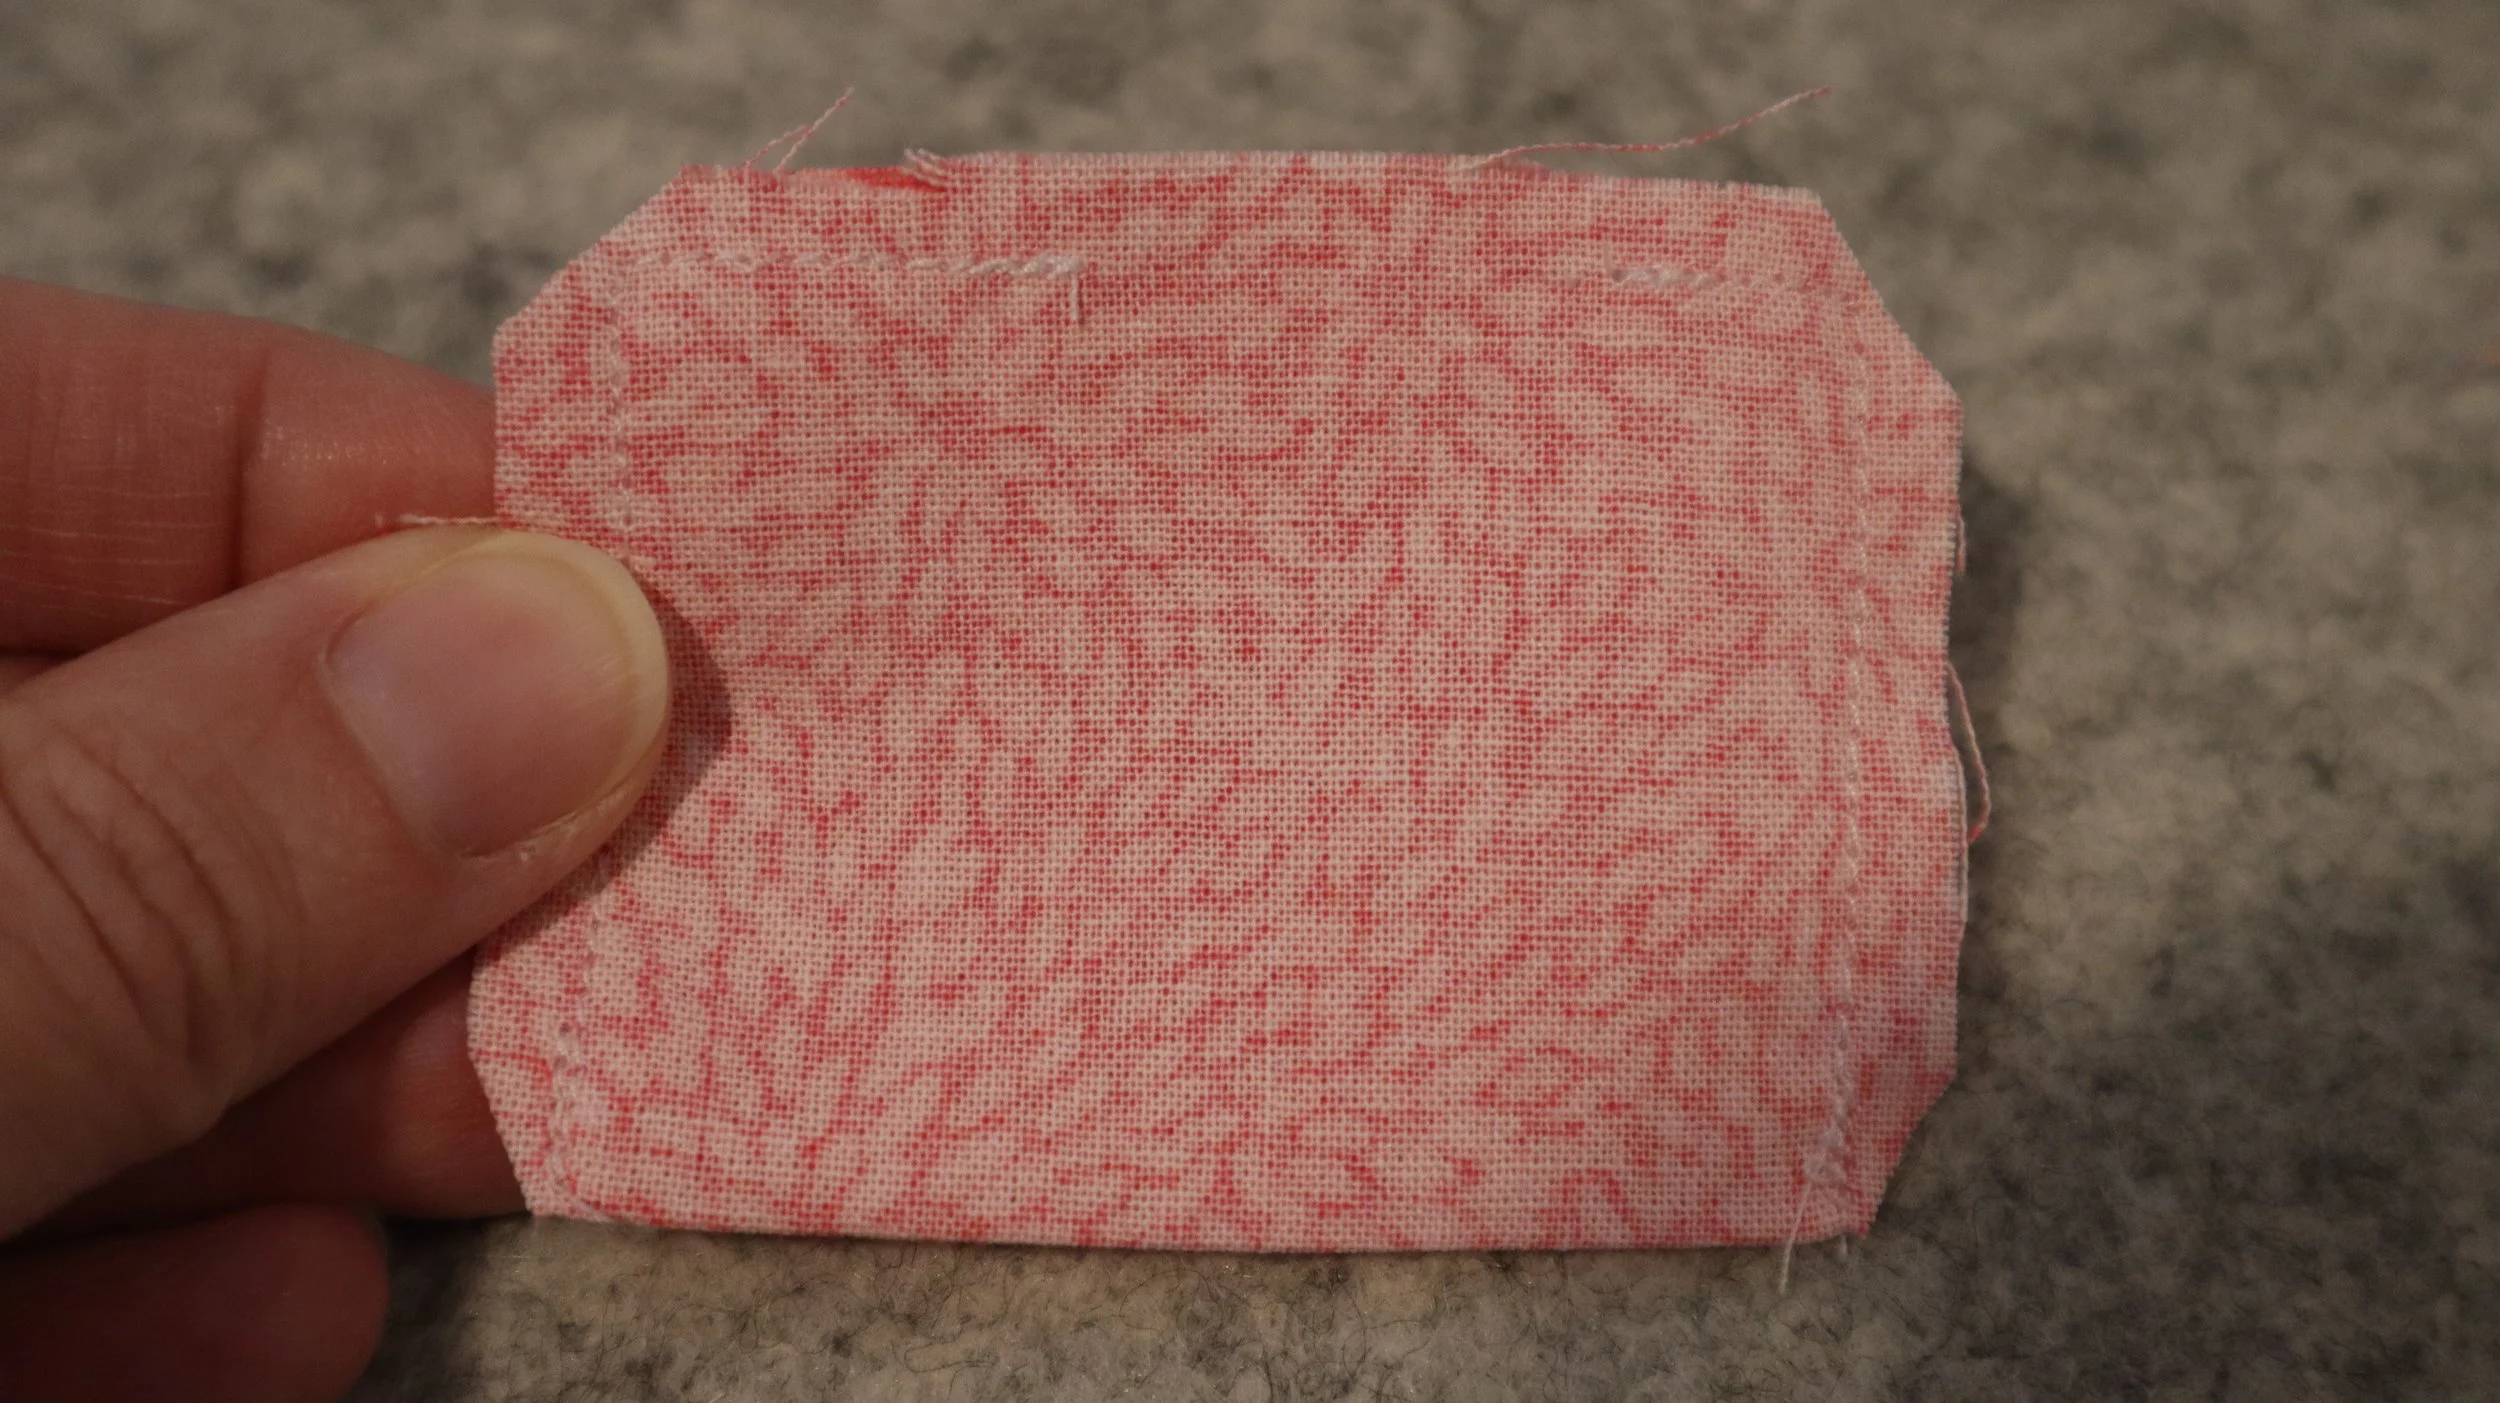
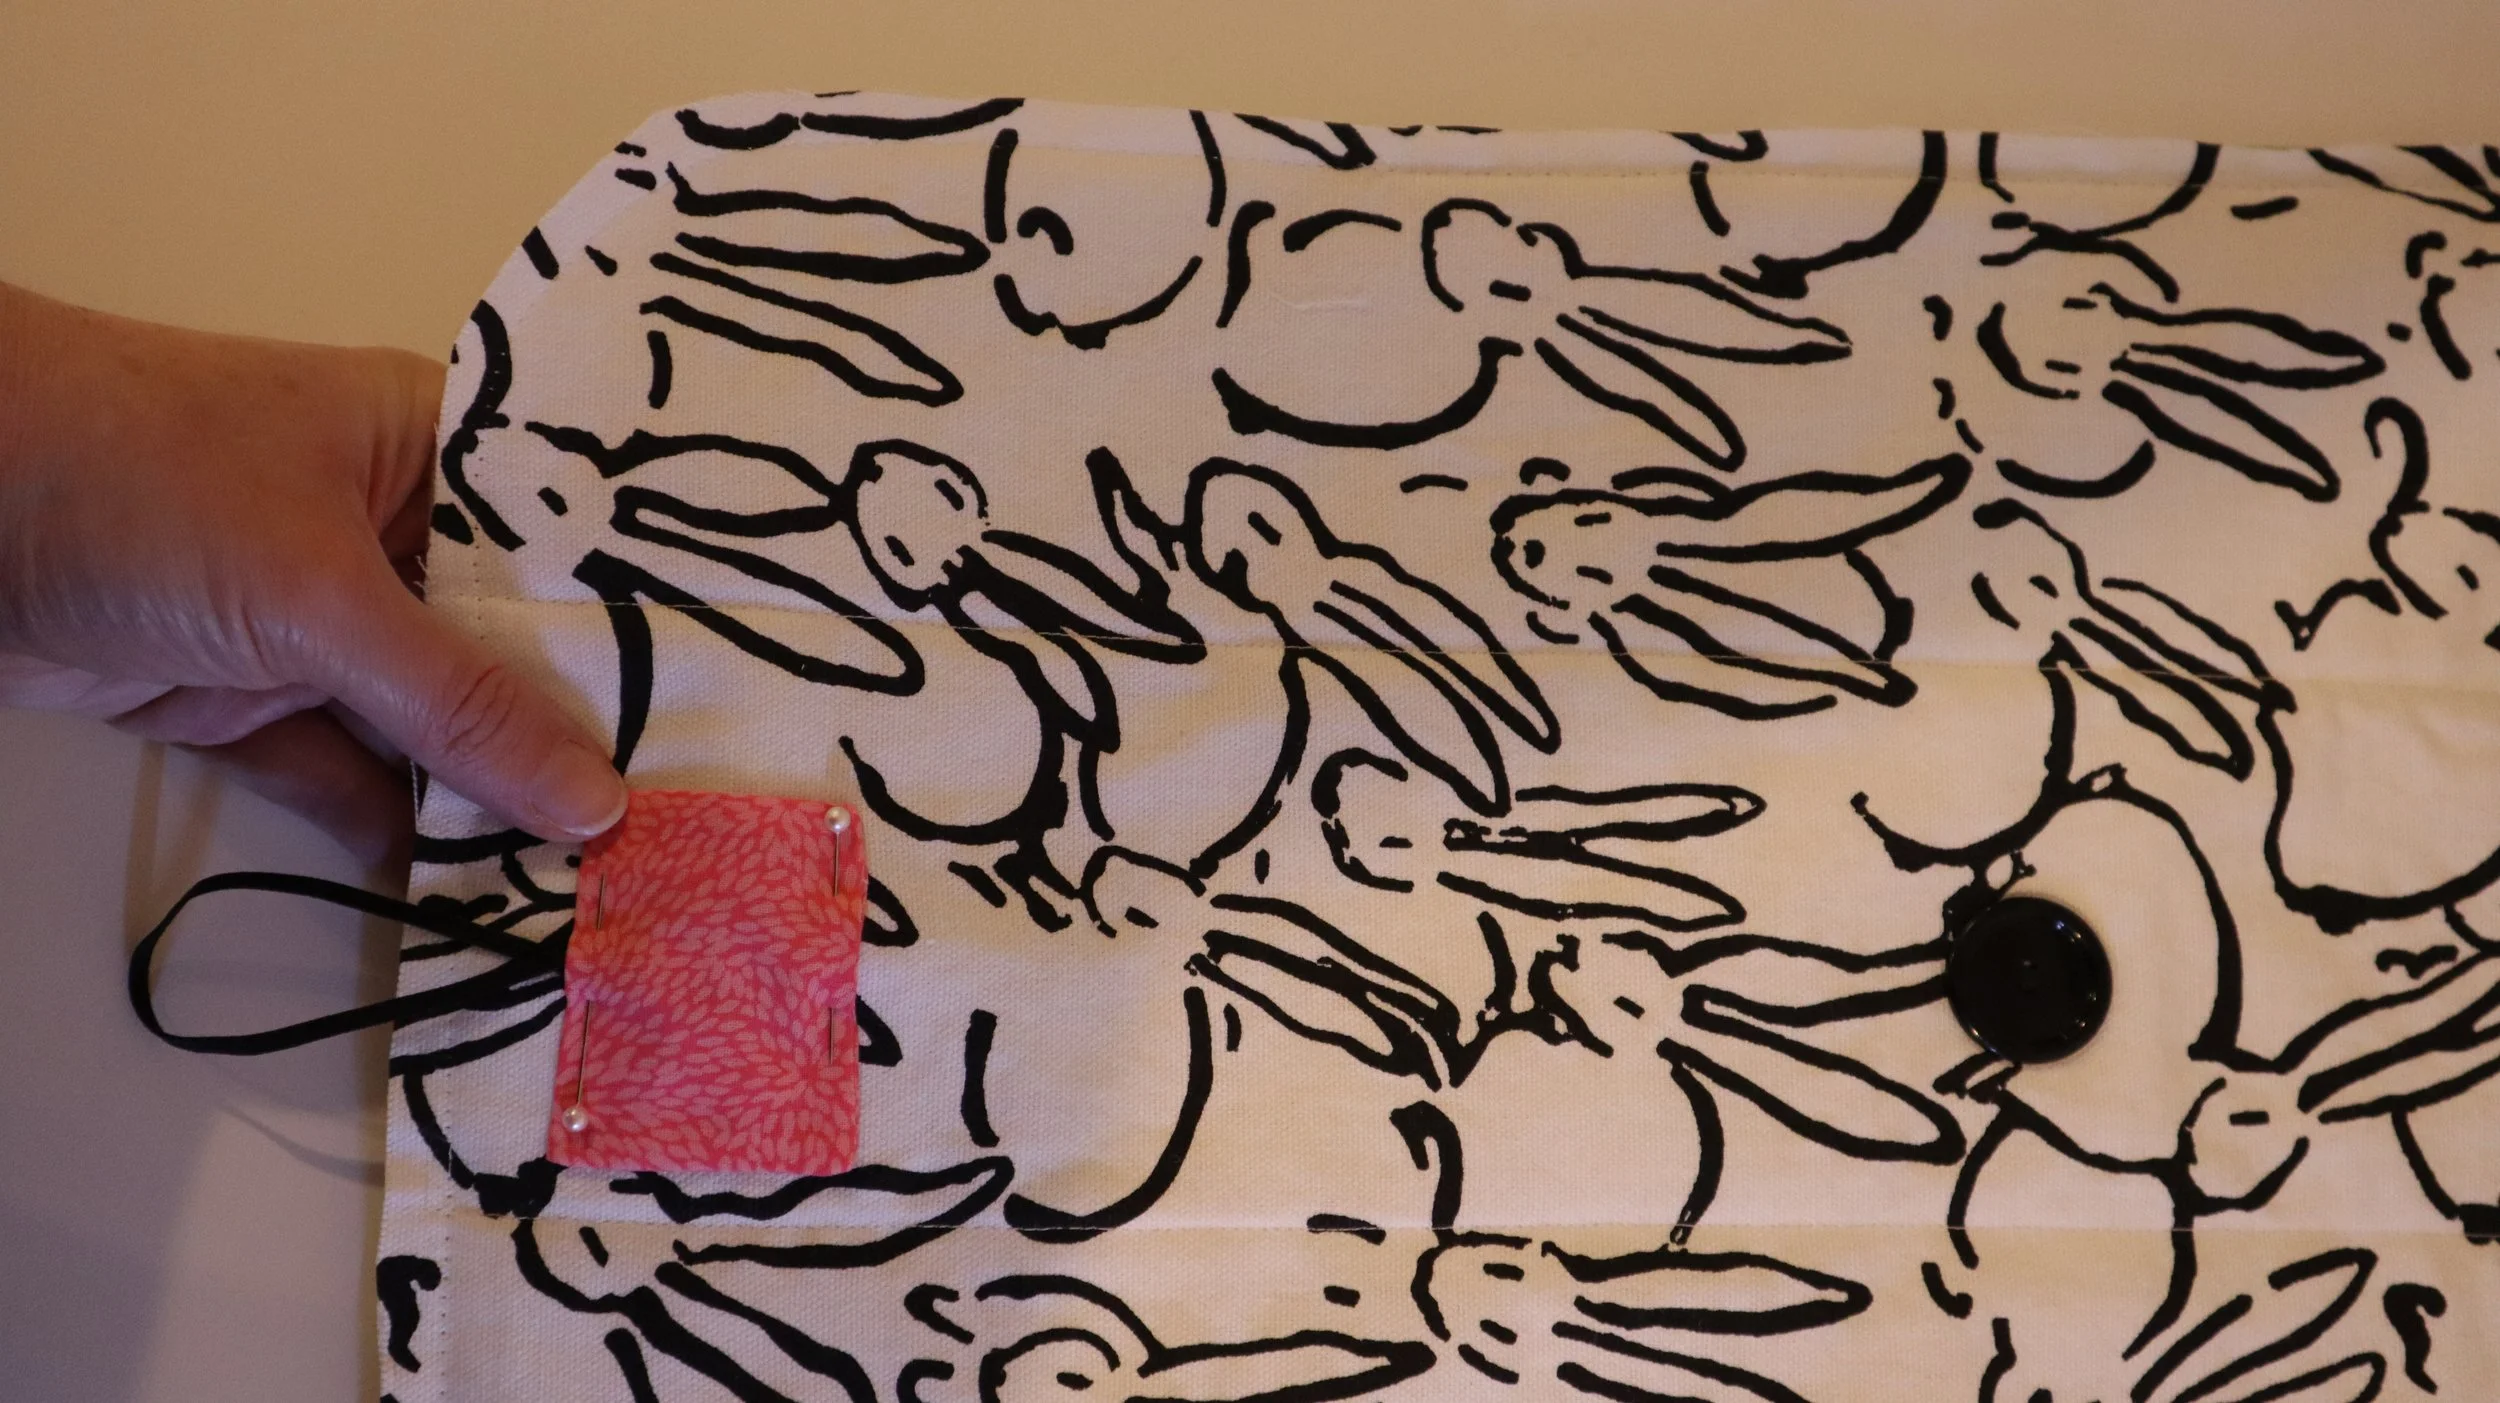
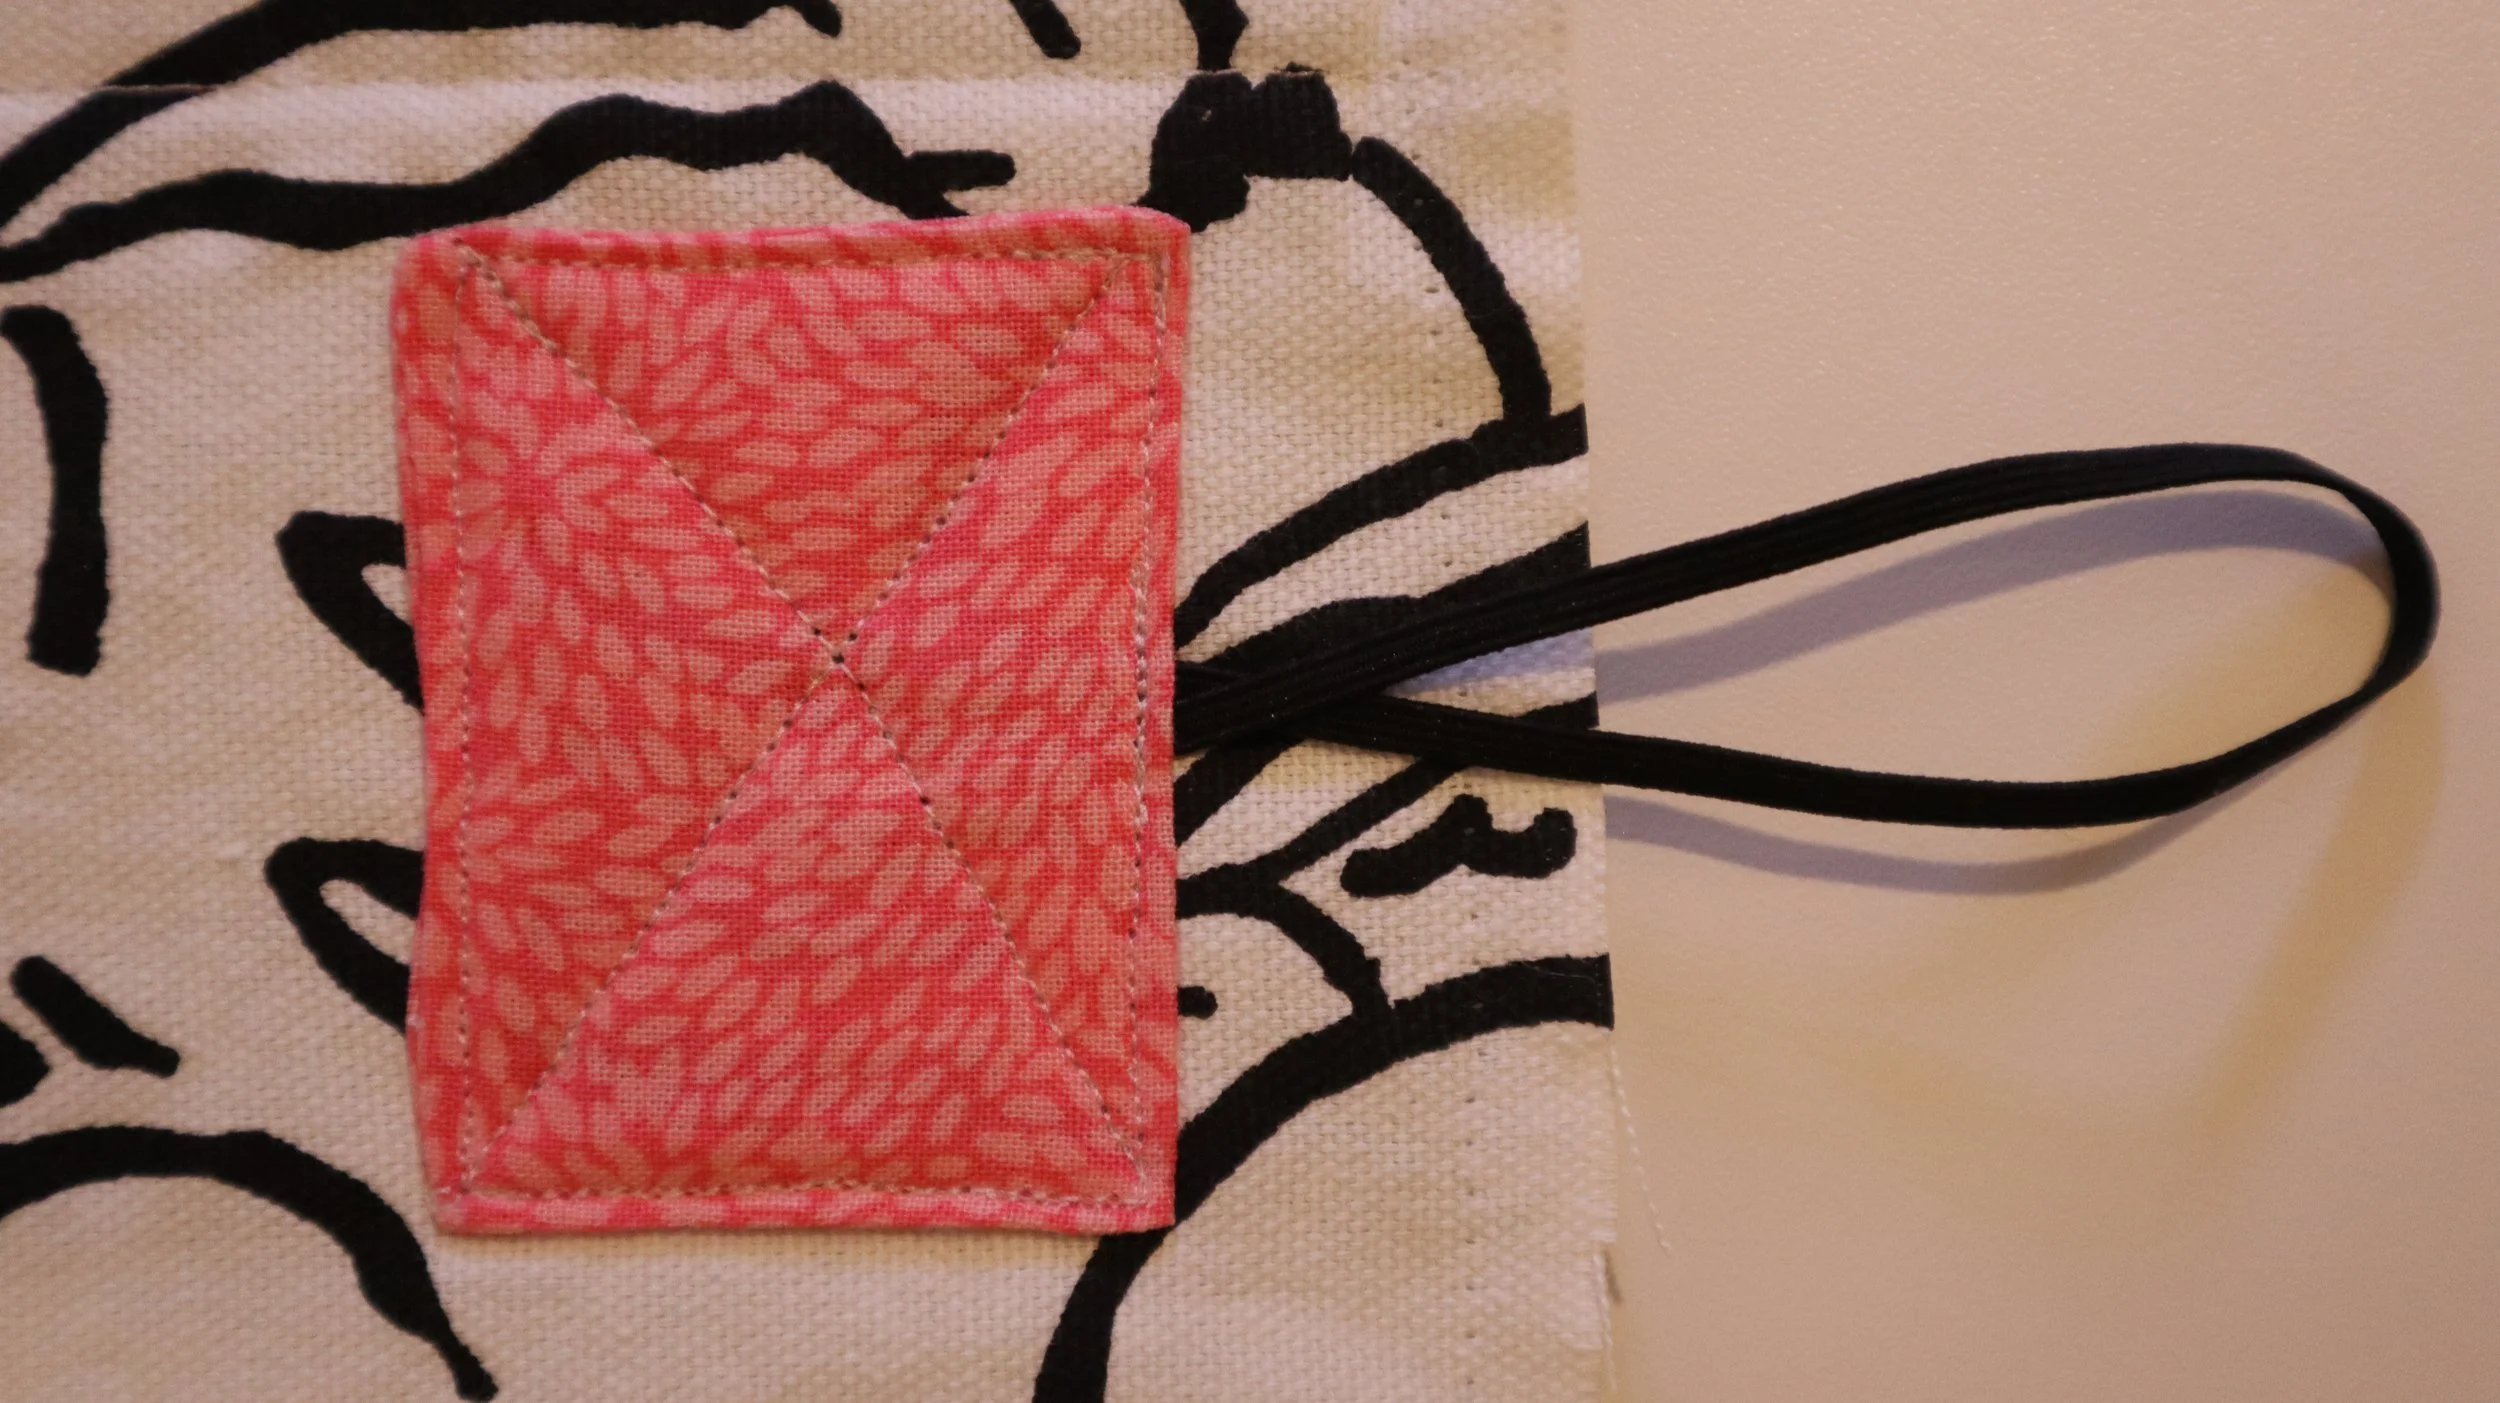
After you’ve quilted together the batting and cotton layers, it’s time to sew on the button and elastic. Measure 10 1/4 inches from the bottom and 5 1/4 inches from the center. Hand stitch your button in place. Next, make sure your elastic lines up with the placement of your button and sew it about 1 inch from the bottom edge of the travel changing pad. To cover the raw ends of the elastic, make a little patch of your scrap fabric, and then sew it on the changing pad. I doubled up the fabric like I was making a tiny pillow case, and then turned it right side out and sewed around all four edges as well as made a large X in the center for extra security. If you like to add a label to your projects, I think this could be a good place to put it. I like a little bit of contrast, so I went with a scrap of fabric in a different print than the rest of my changing pad, but if you want the patch to blend in, just use the same fabric as you used for the heavy cotton layer.

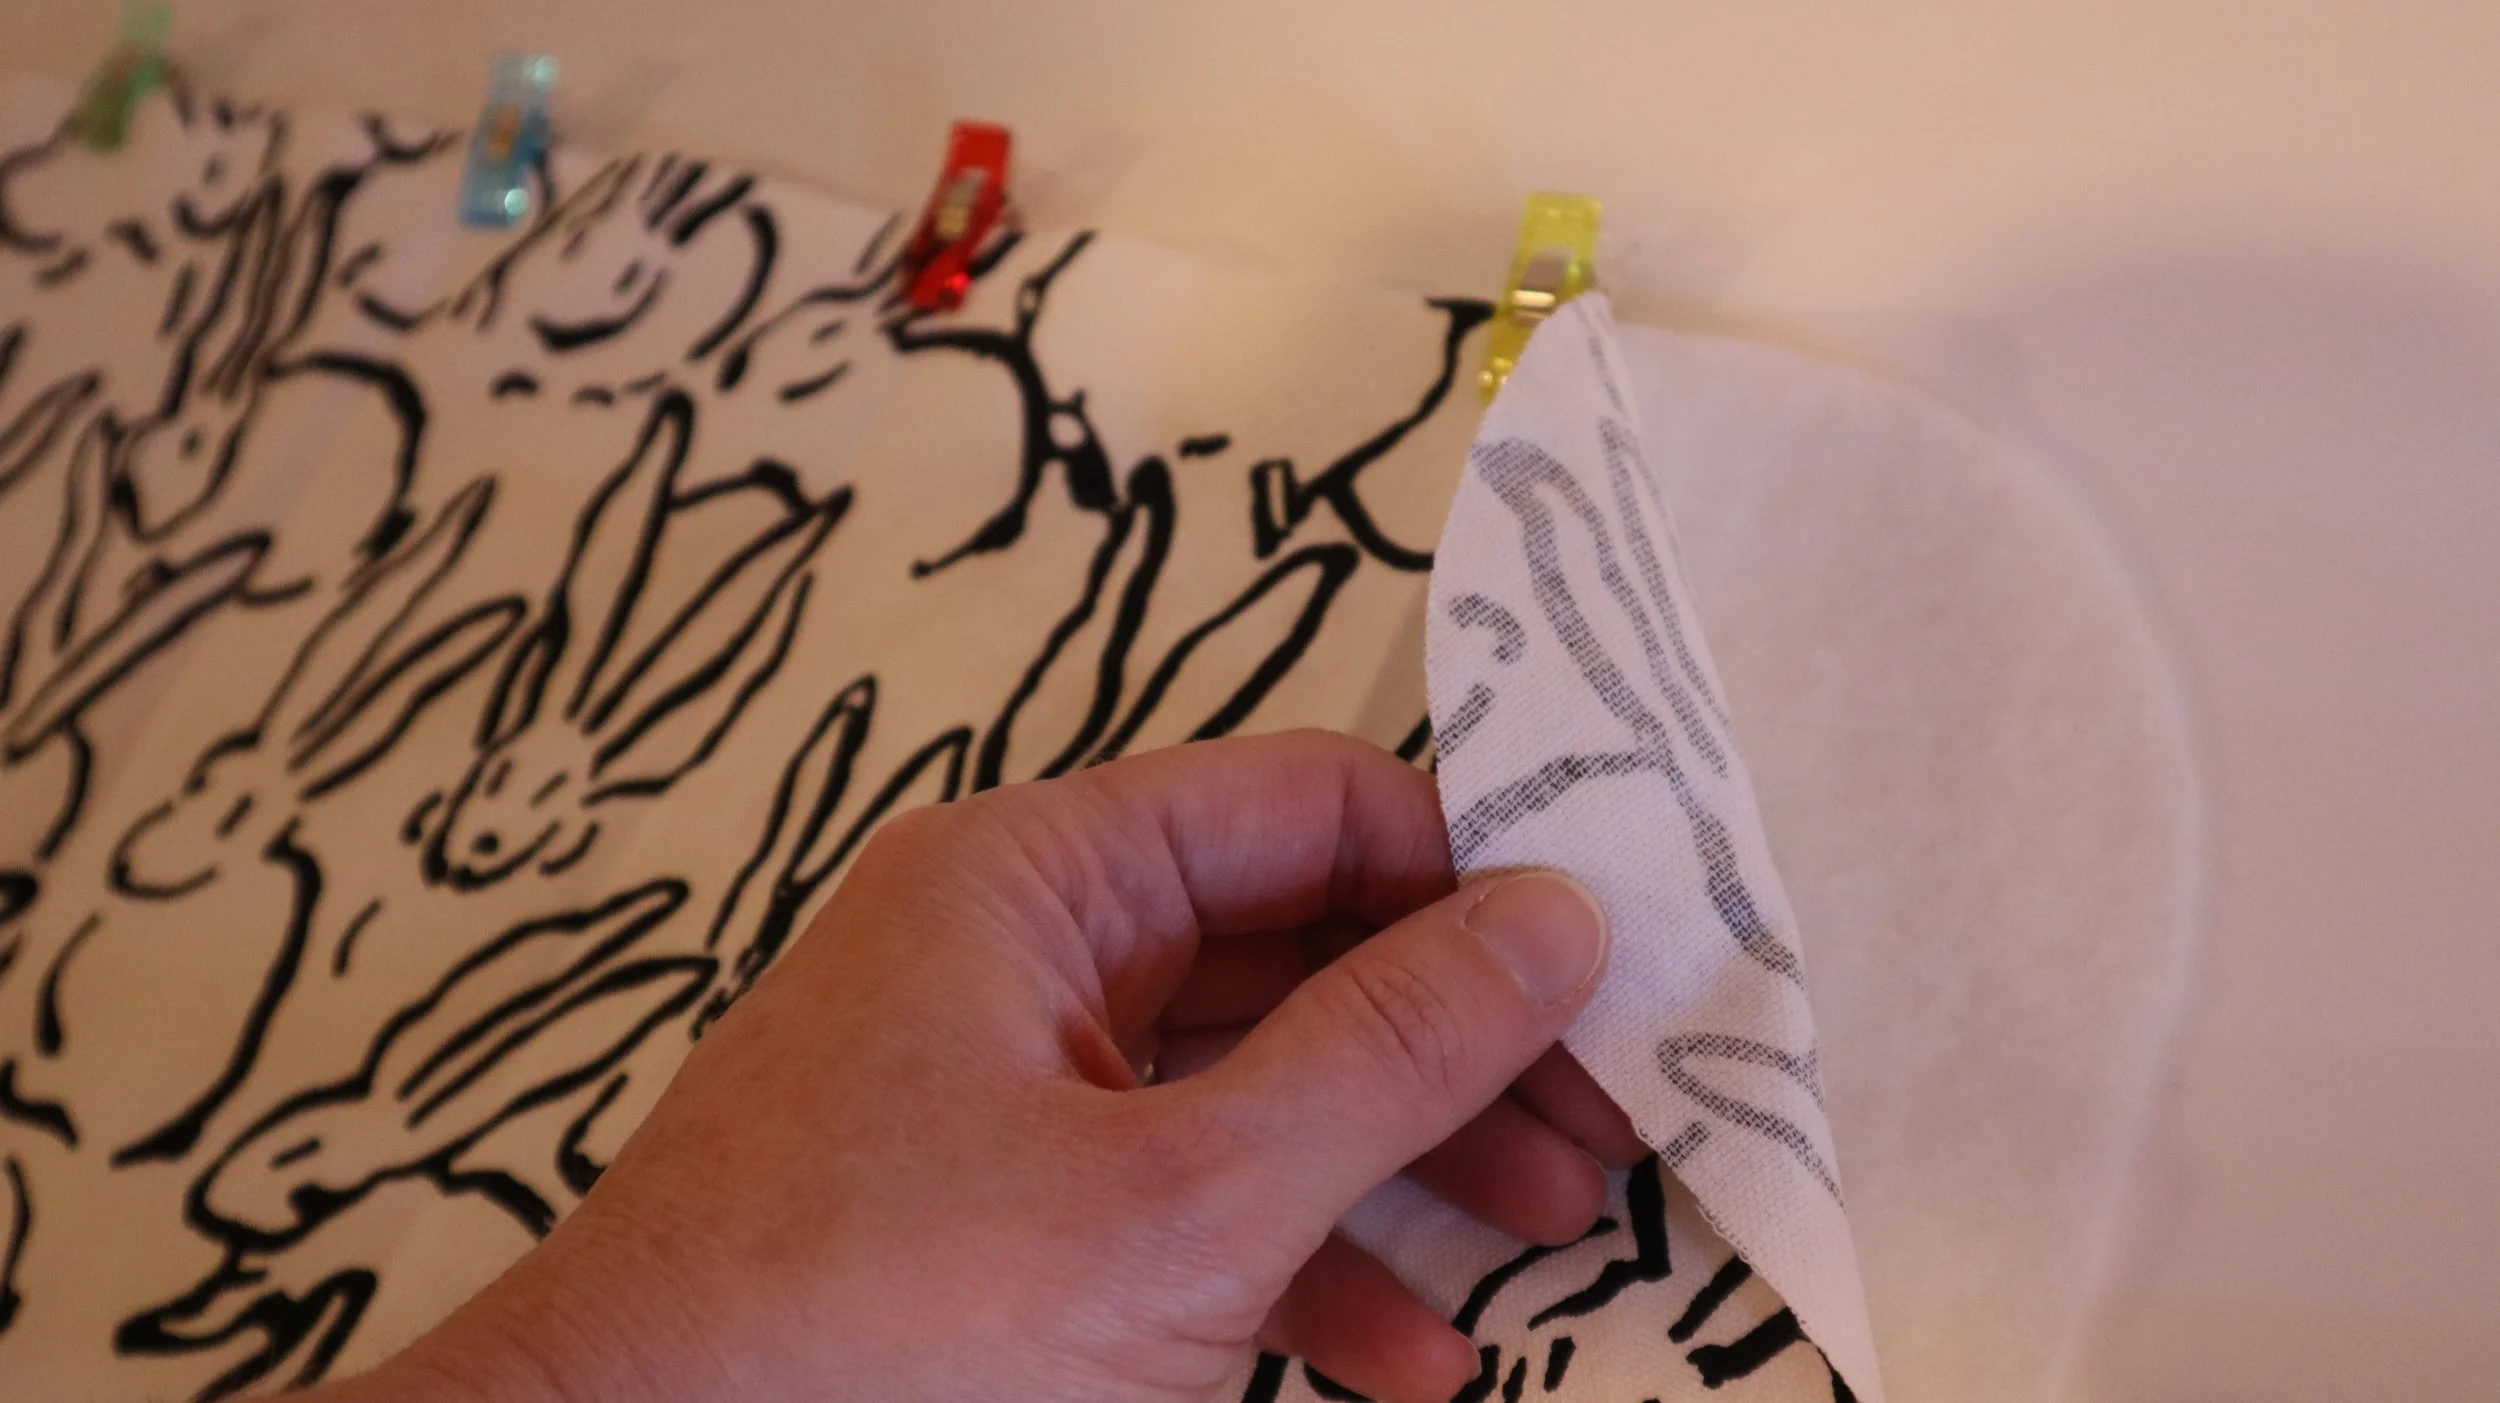
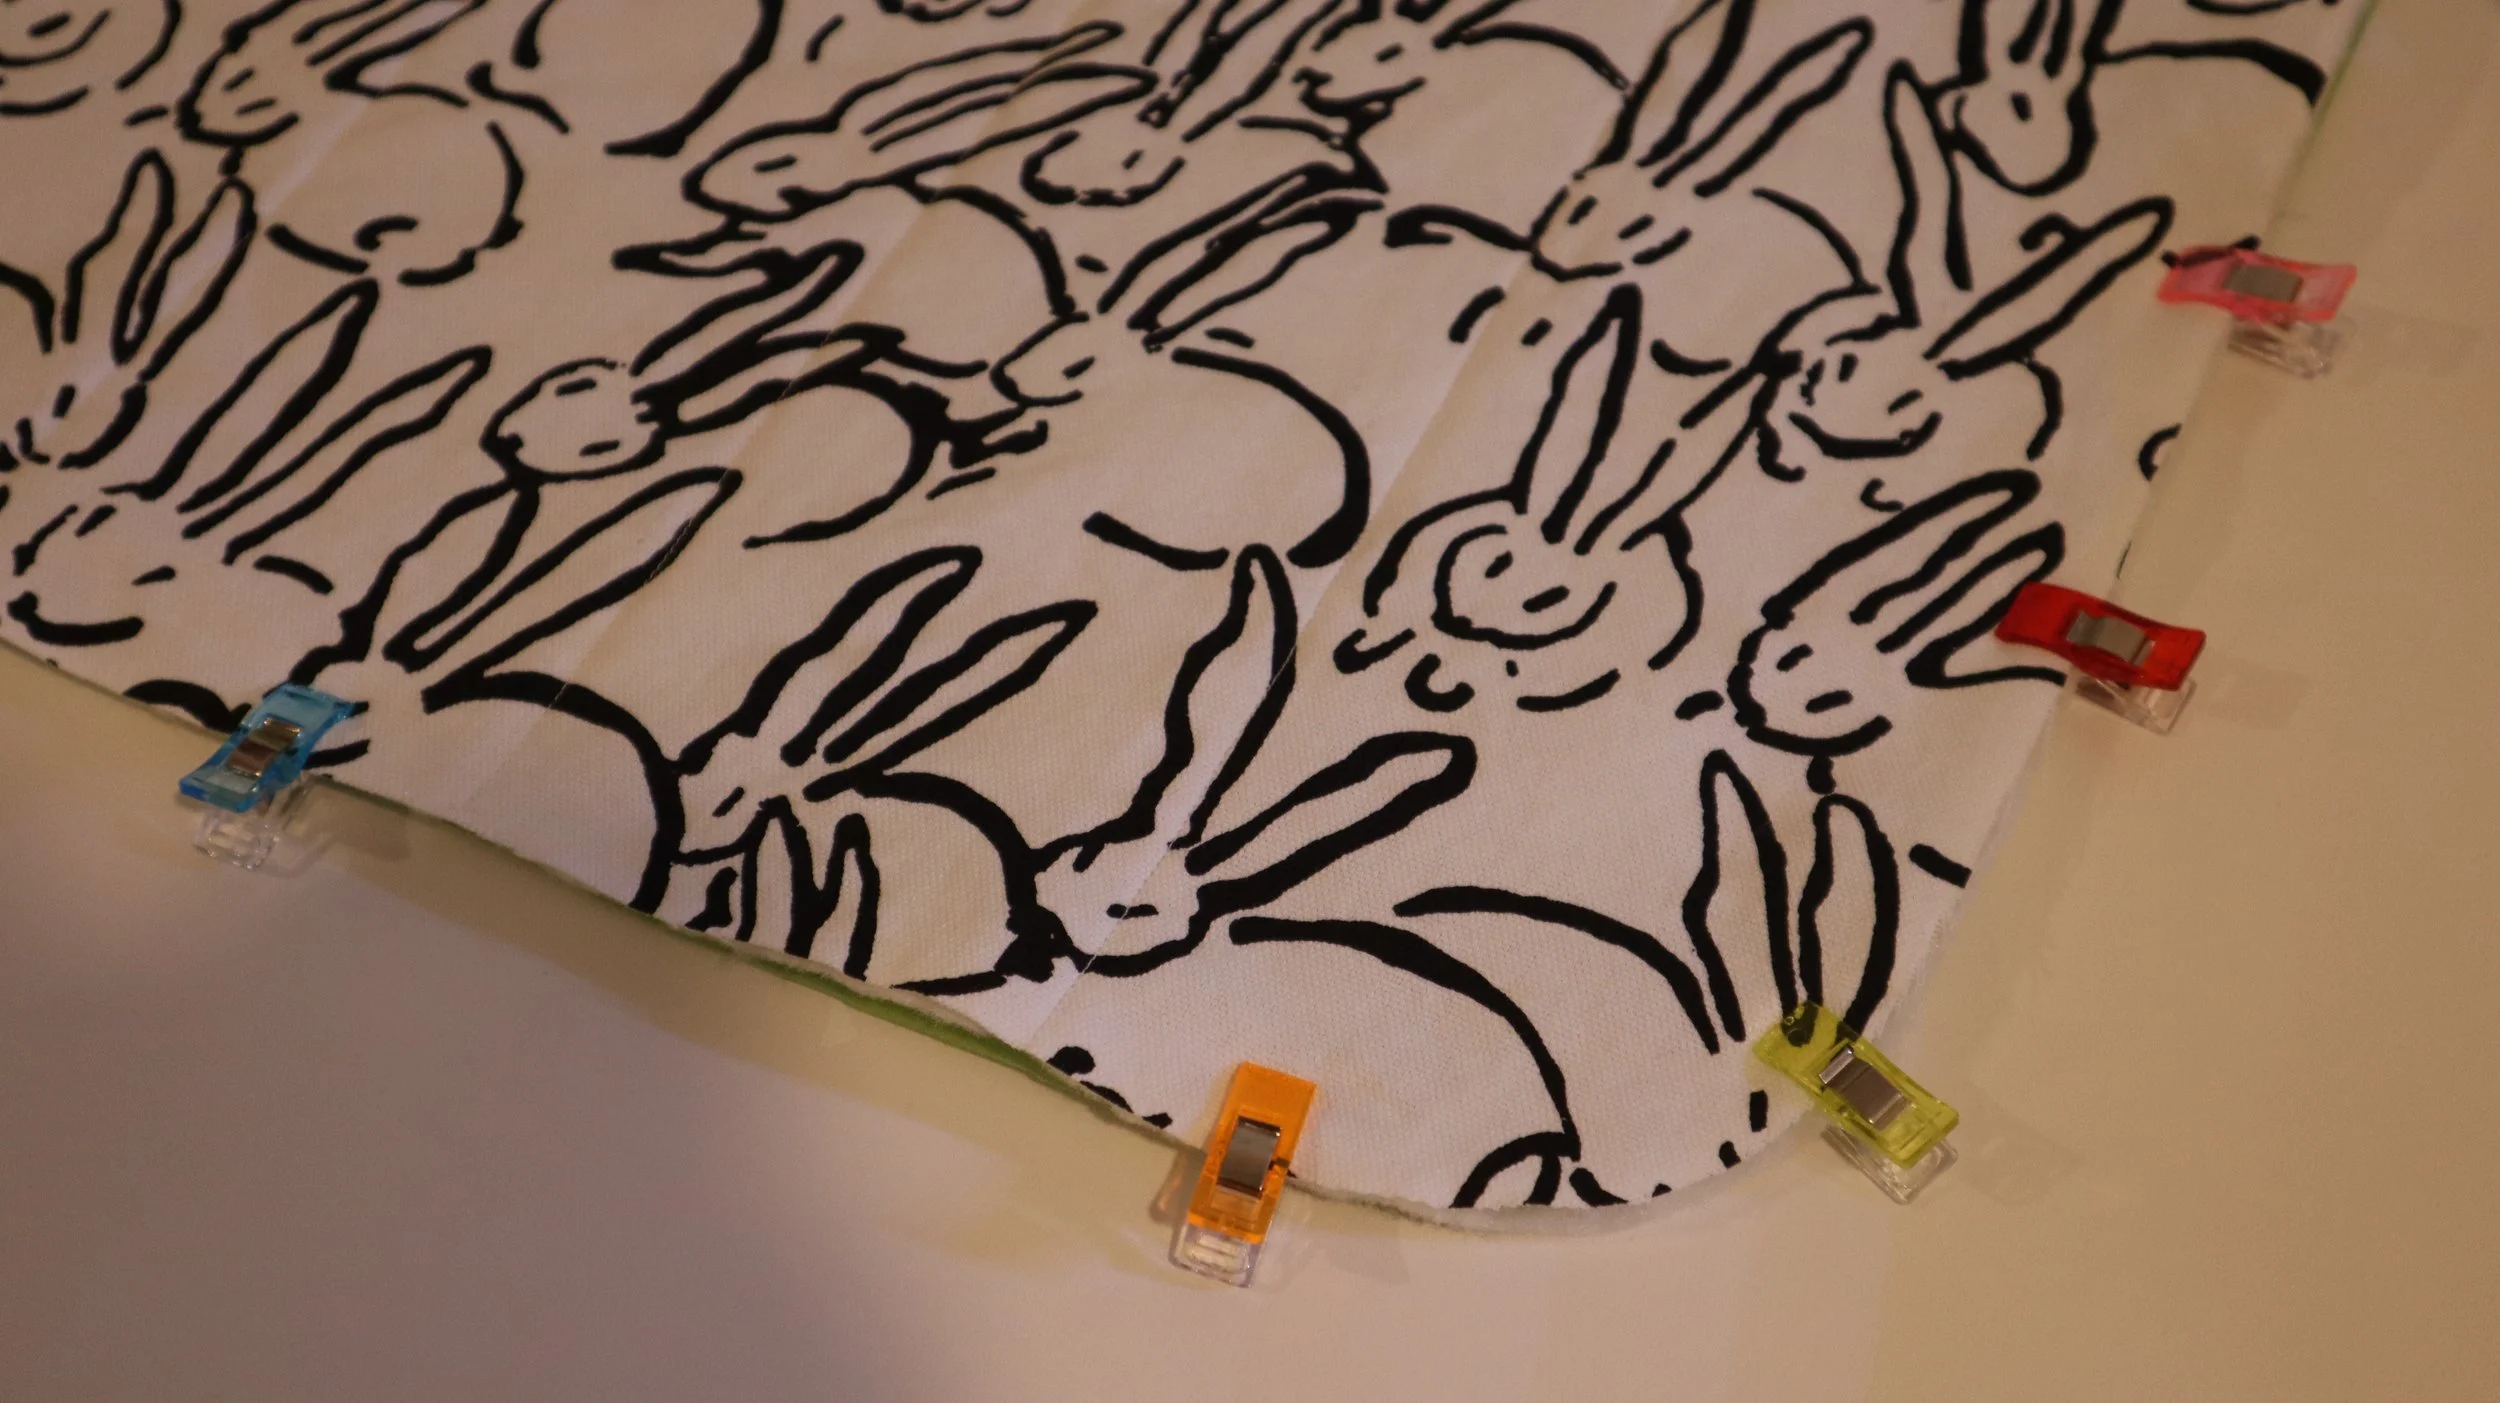
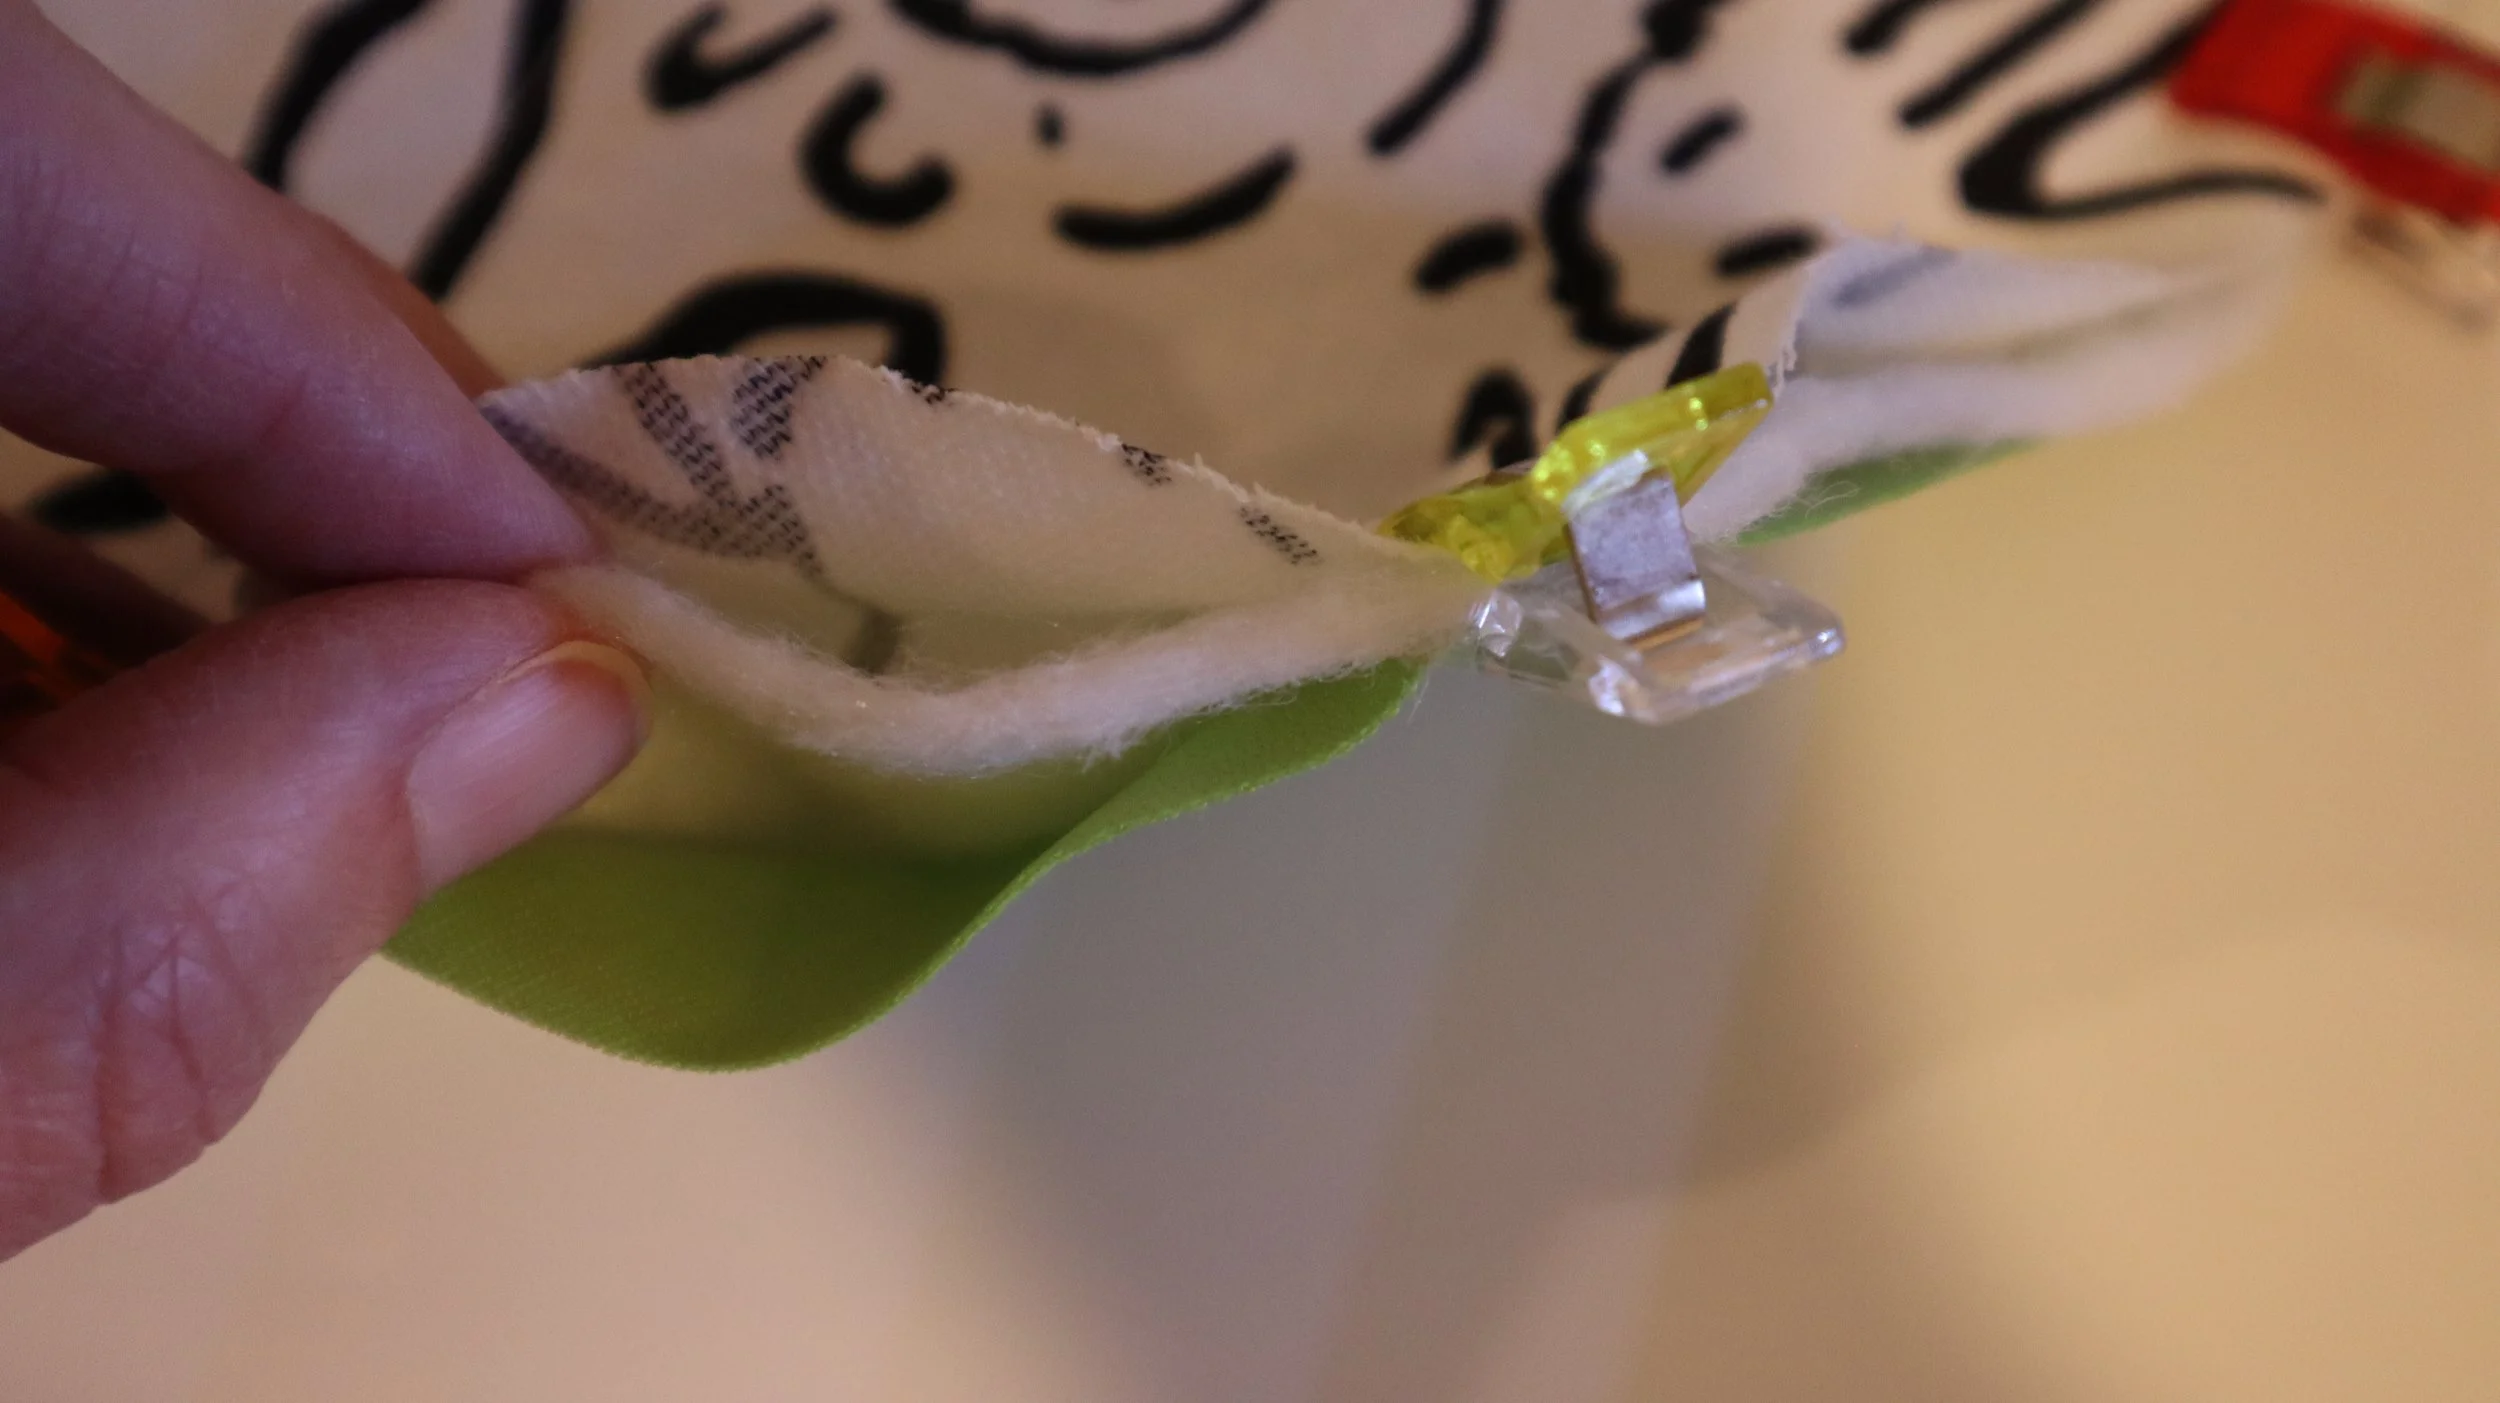
Now we will attach the PUL layer. This fabric is a bit slippery to work with, so I recommend clipping or pinning it around the edges. If you use pins, try to keep them very close to the edges, so any holes the pins leave will be later encased in the bias binding and won’t compromise the waterproof features of your travel changing pad. Once you have everything pinned in place, baste the whole way around the changing pad, about 1/8 inch from the edges. Be sure to move the elastic loop out of the way and don’t sew through it.
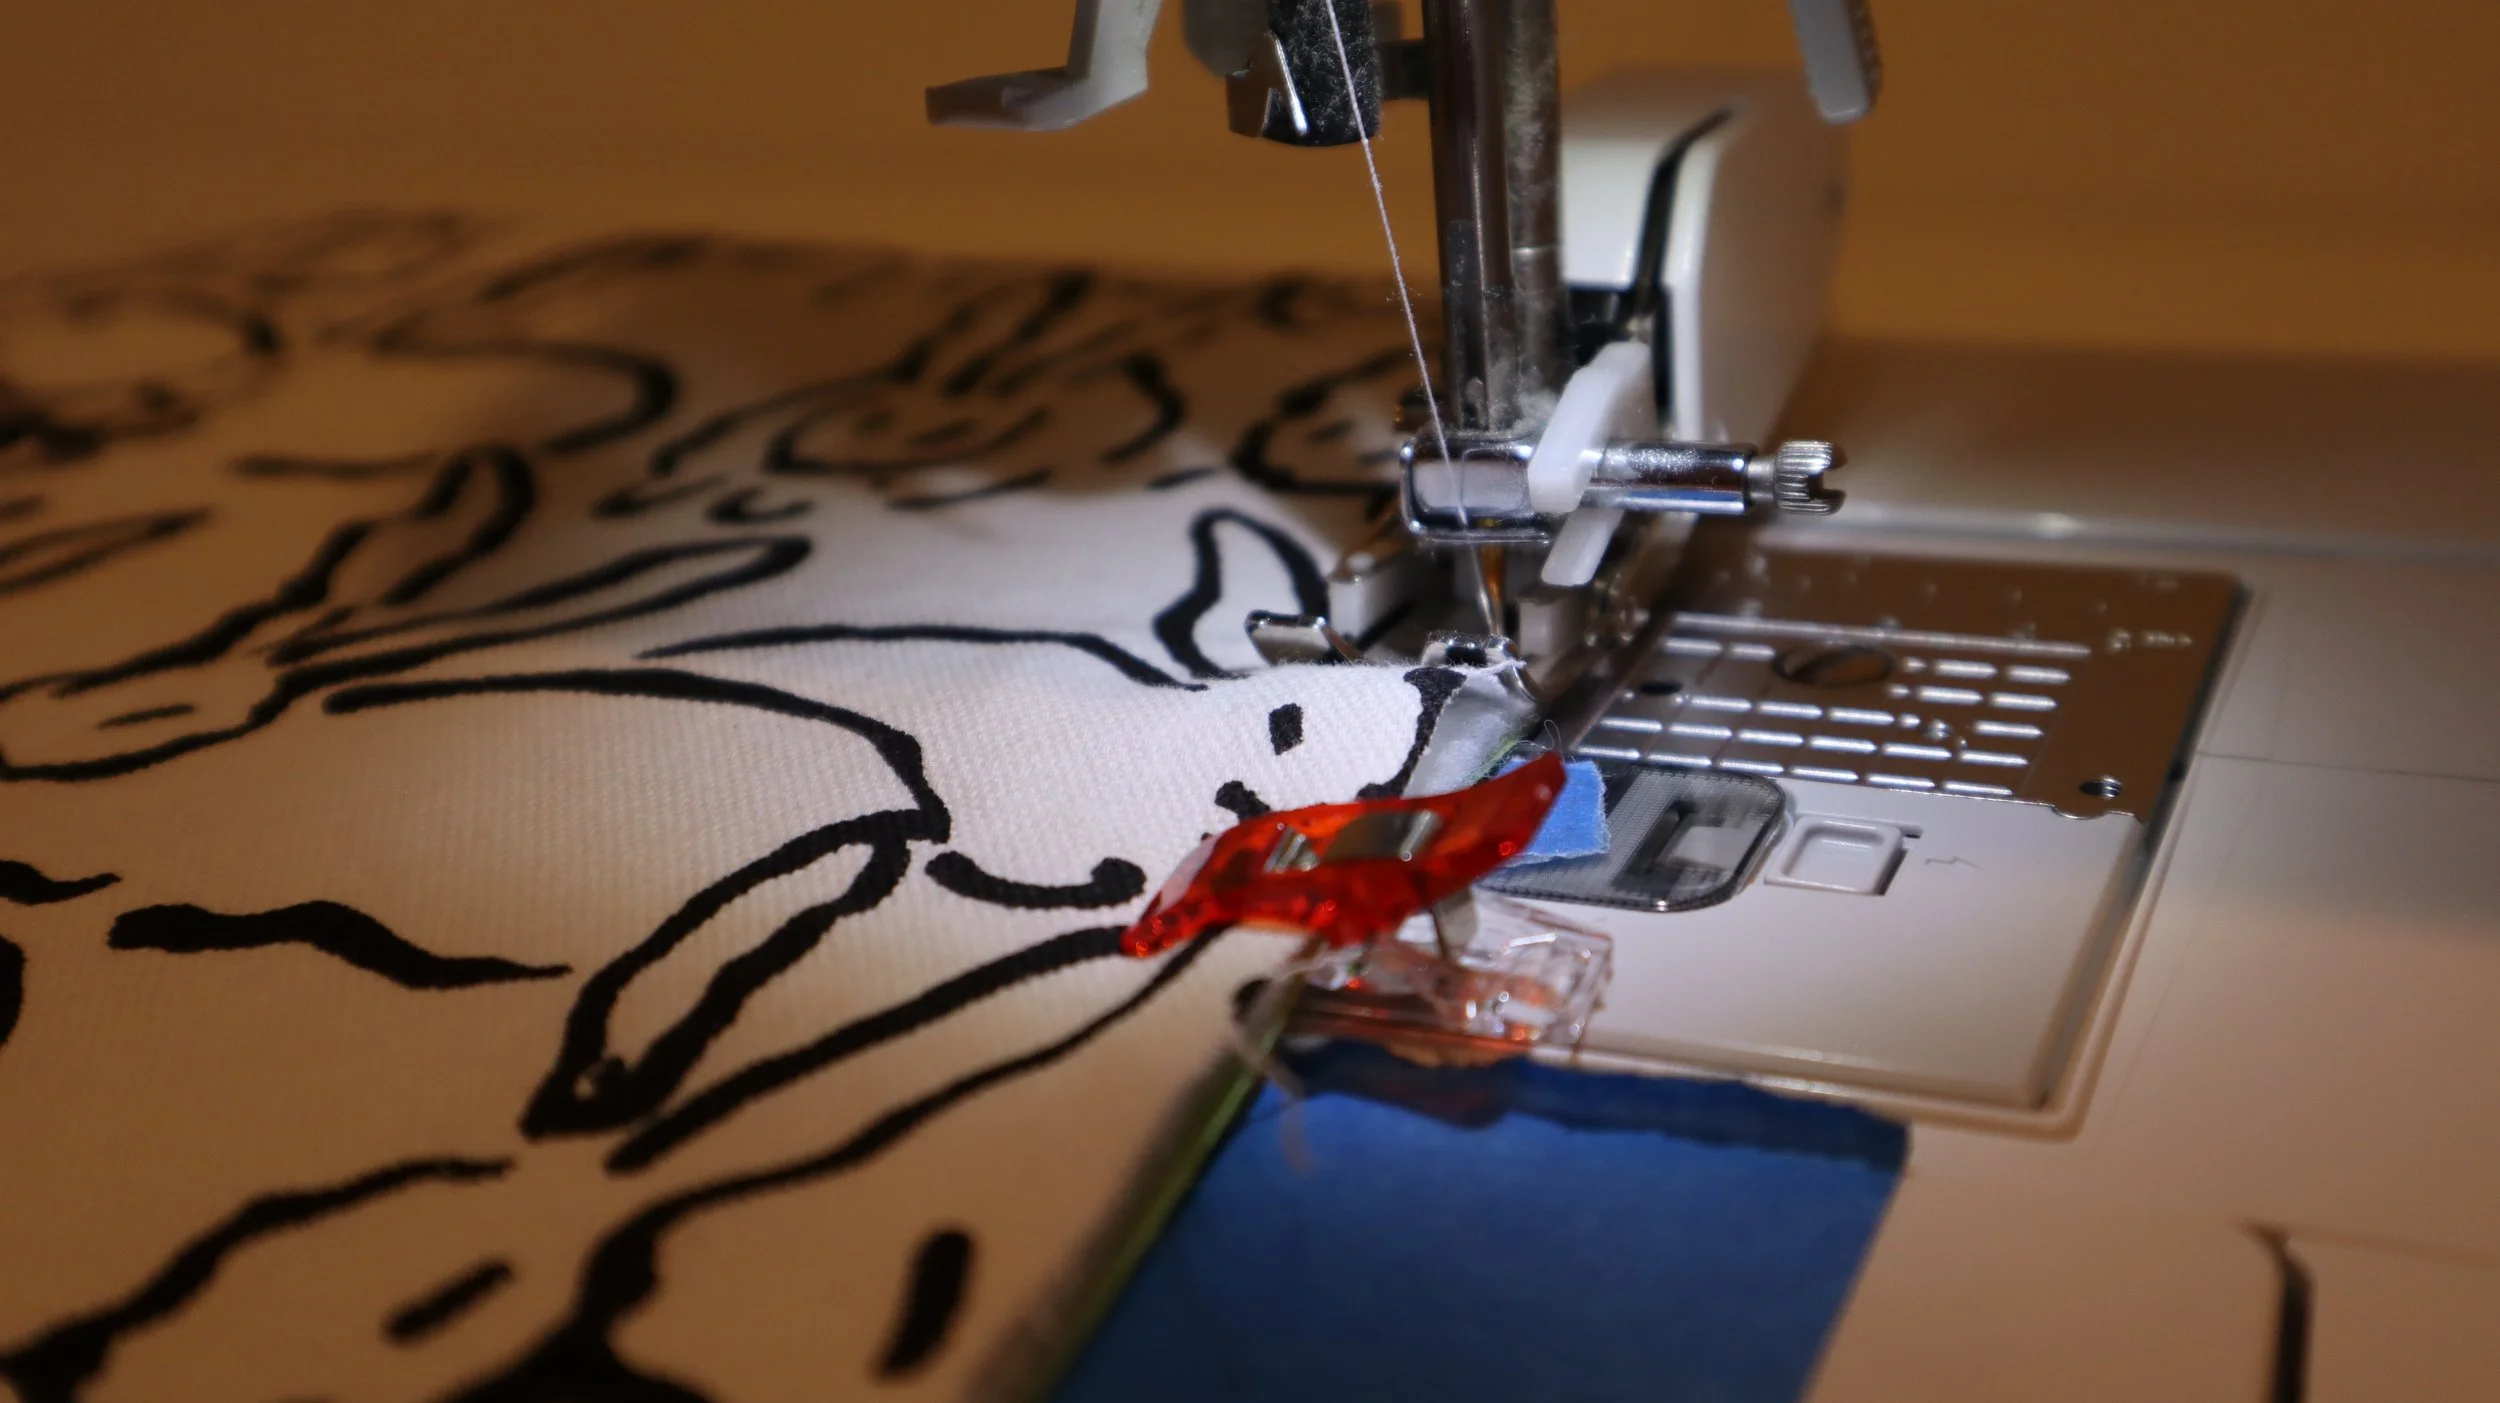
Last, we will sew the bias tape around the edges. There are many ways to do this. Sometimes I do it the “proper” way and sometimes (especially for a utilitarian item like this changing pad), I do it the cheater’s way. Any method you prefer should work just fine, I would just advise that if you like to use a method that requires you to hand stitch one side in place, I recommend that the hand stitching be done on the cotton side. It will be easier to work with and again, less holes in the waterproof fabric